Adding Your First Product
Upload a 3D file and turn it into a sellable product in under 2 minutes.
How it works
Creating a product on PrintPort3D is a two-step process:
Upload a file
Add 3D files to your library. We analyze them automatically to calculate print time, material usage, and production cost.
Create a product
Select an uploaded file and add product details—name, description, SKU, and your retail price. That's it.
Files vs Products
Step 1: Upload a file
Navigate to the Upload Files section in your dashboard sidebar.
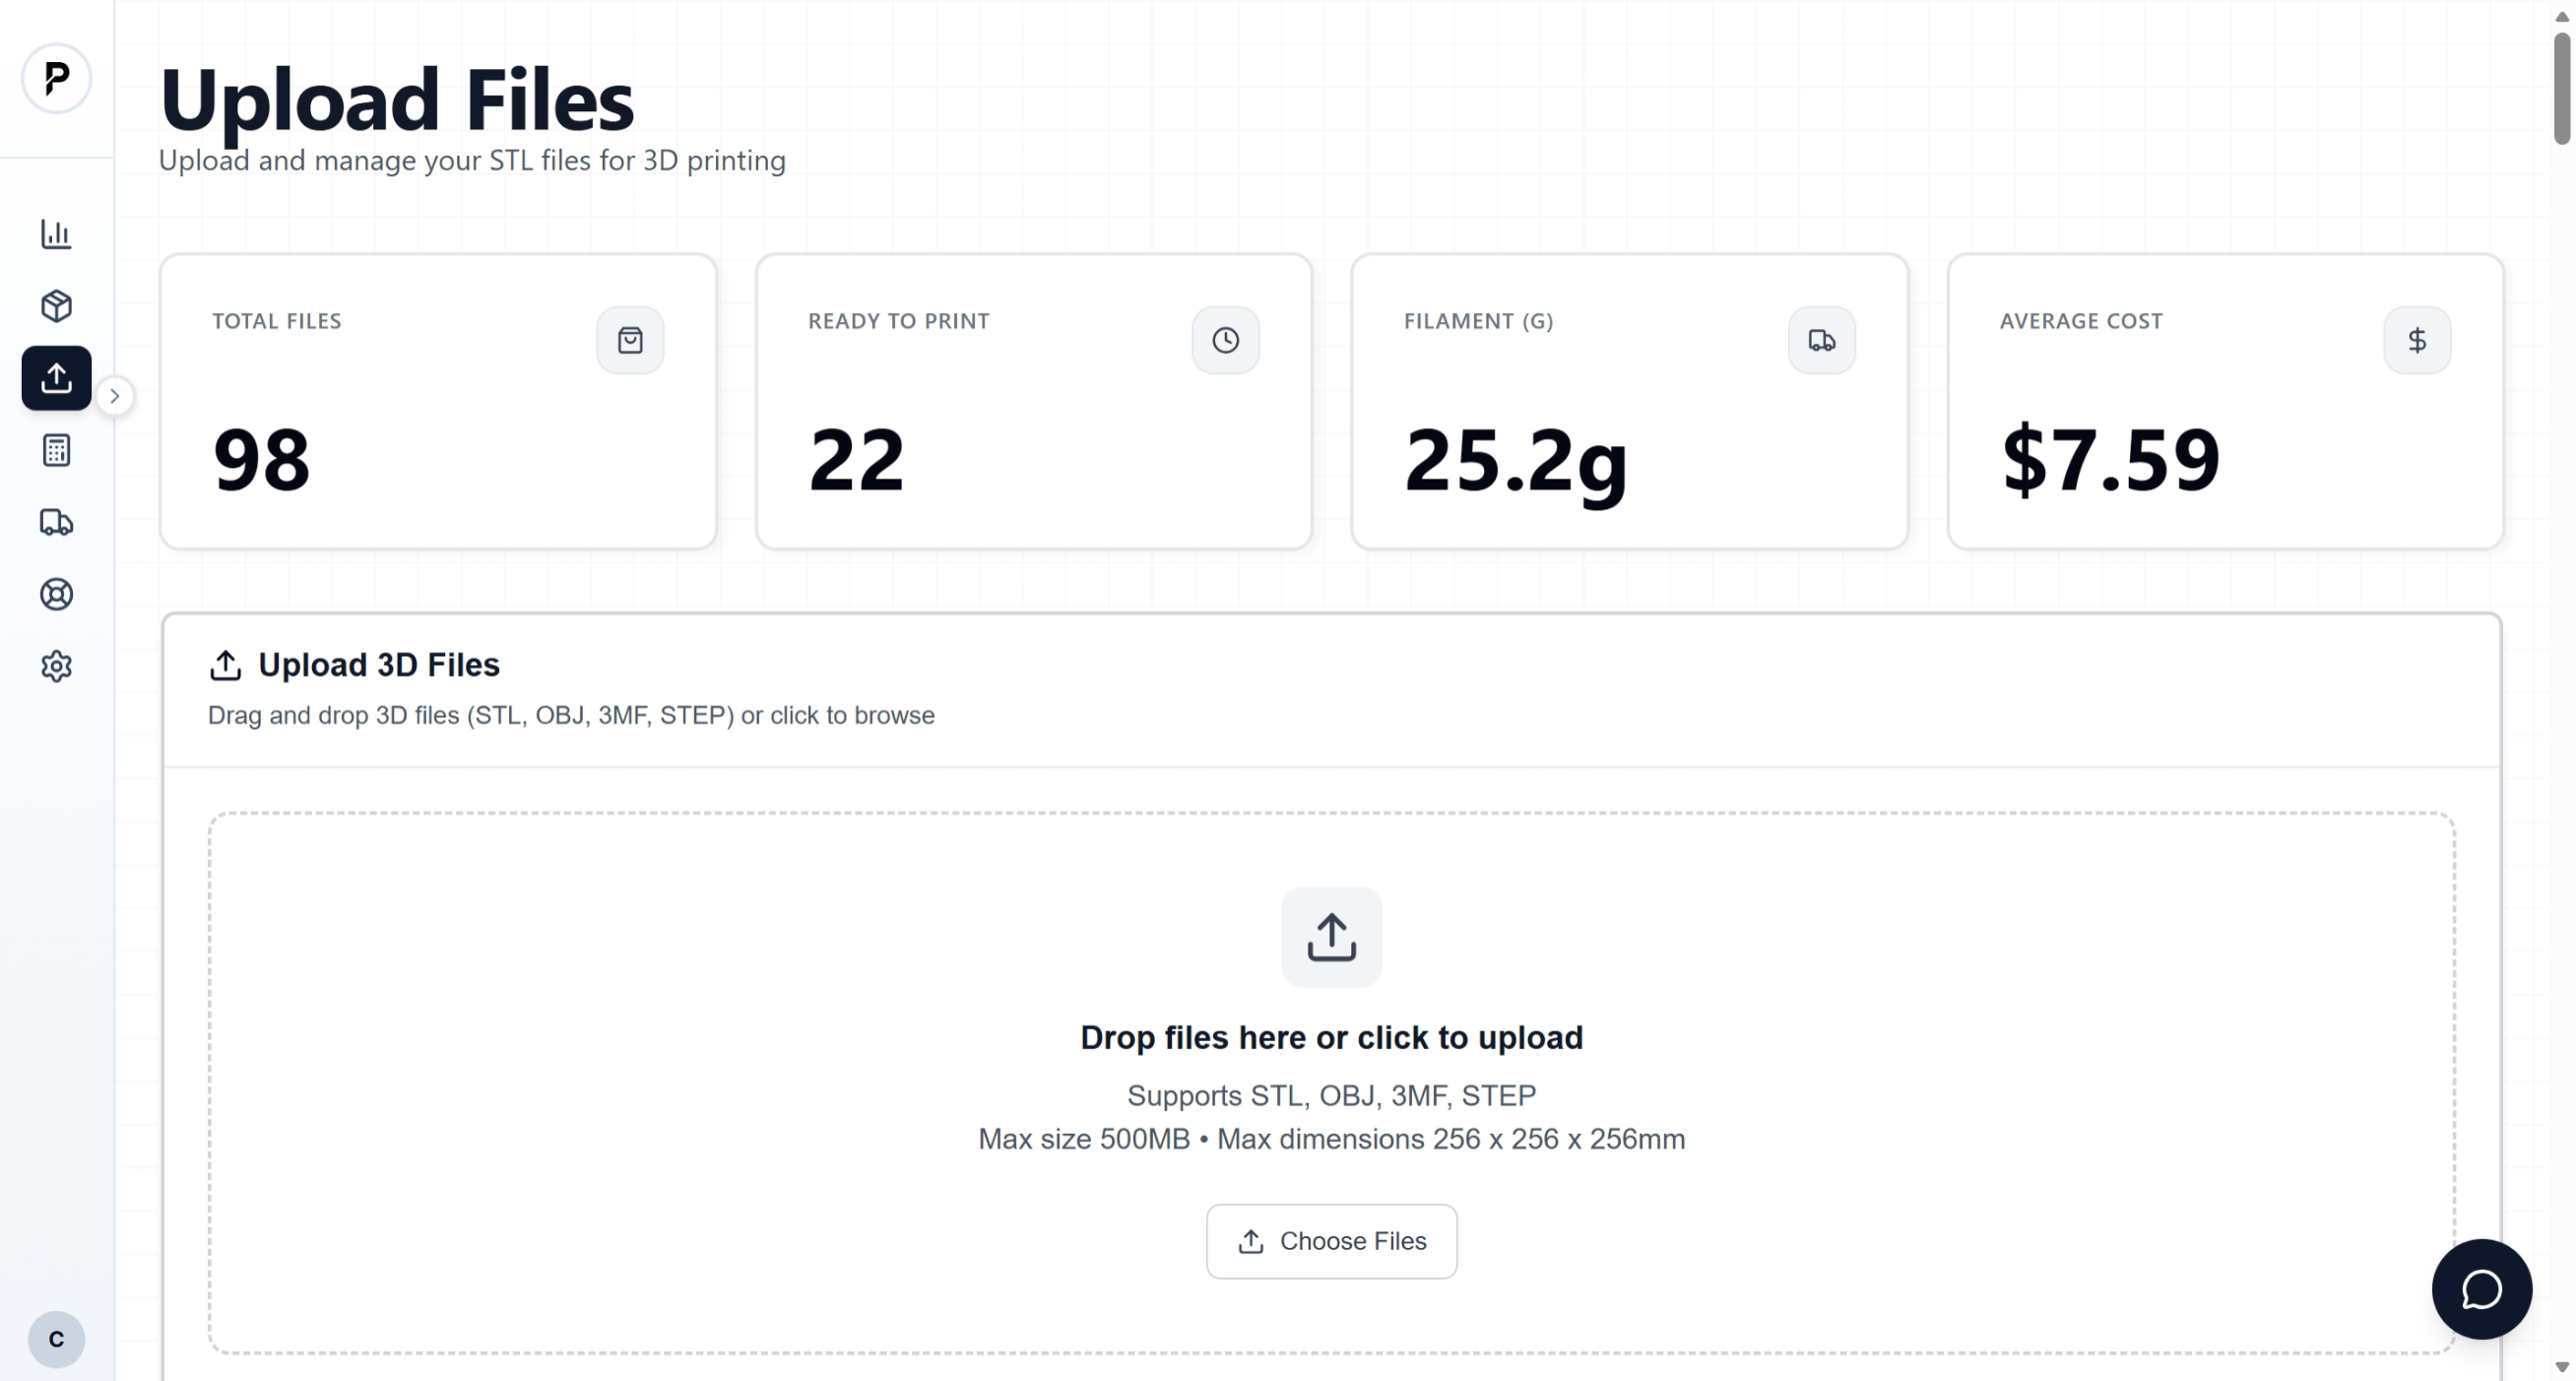
Upload files dashboard
Drag and drop or click to browse
Drop your 3D file into the upload area, or click to browse your computer. We support STL, OBJ, 3MF, and STEP formats up to 500MB.
Wait for analysis
Once uploaded, our system automatically analyzes your file. This typically takes 30-60 seconds and includes:
- •Validation — Checking the file is printable (watertight, correct size)
- •Dimensions — Measuring X, Y, Z size in millimeters
- •Material usage — Calculating filament weight in grams
- •Print time — Estimating how long the print will take
- •Production cost — Your cost to fulfill this item
Review the results
When analysis completes, you'll see a summary with all the calculated data. The file is now in your library and ready to be turned into a product.
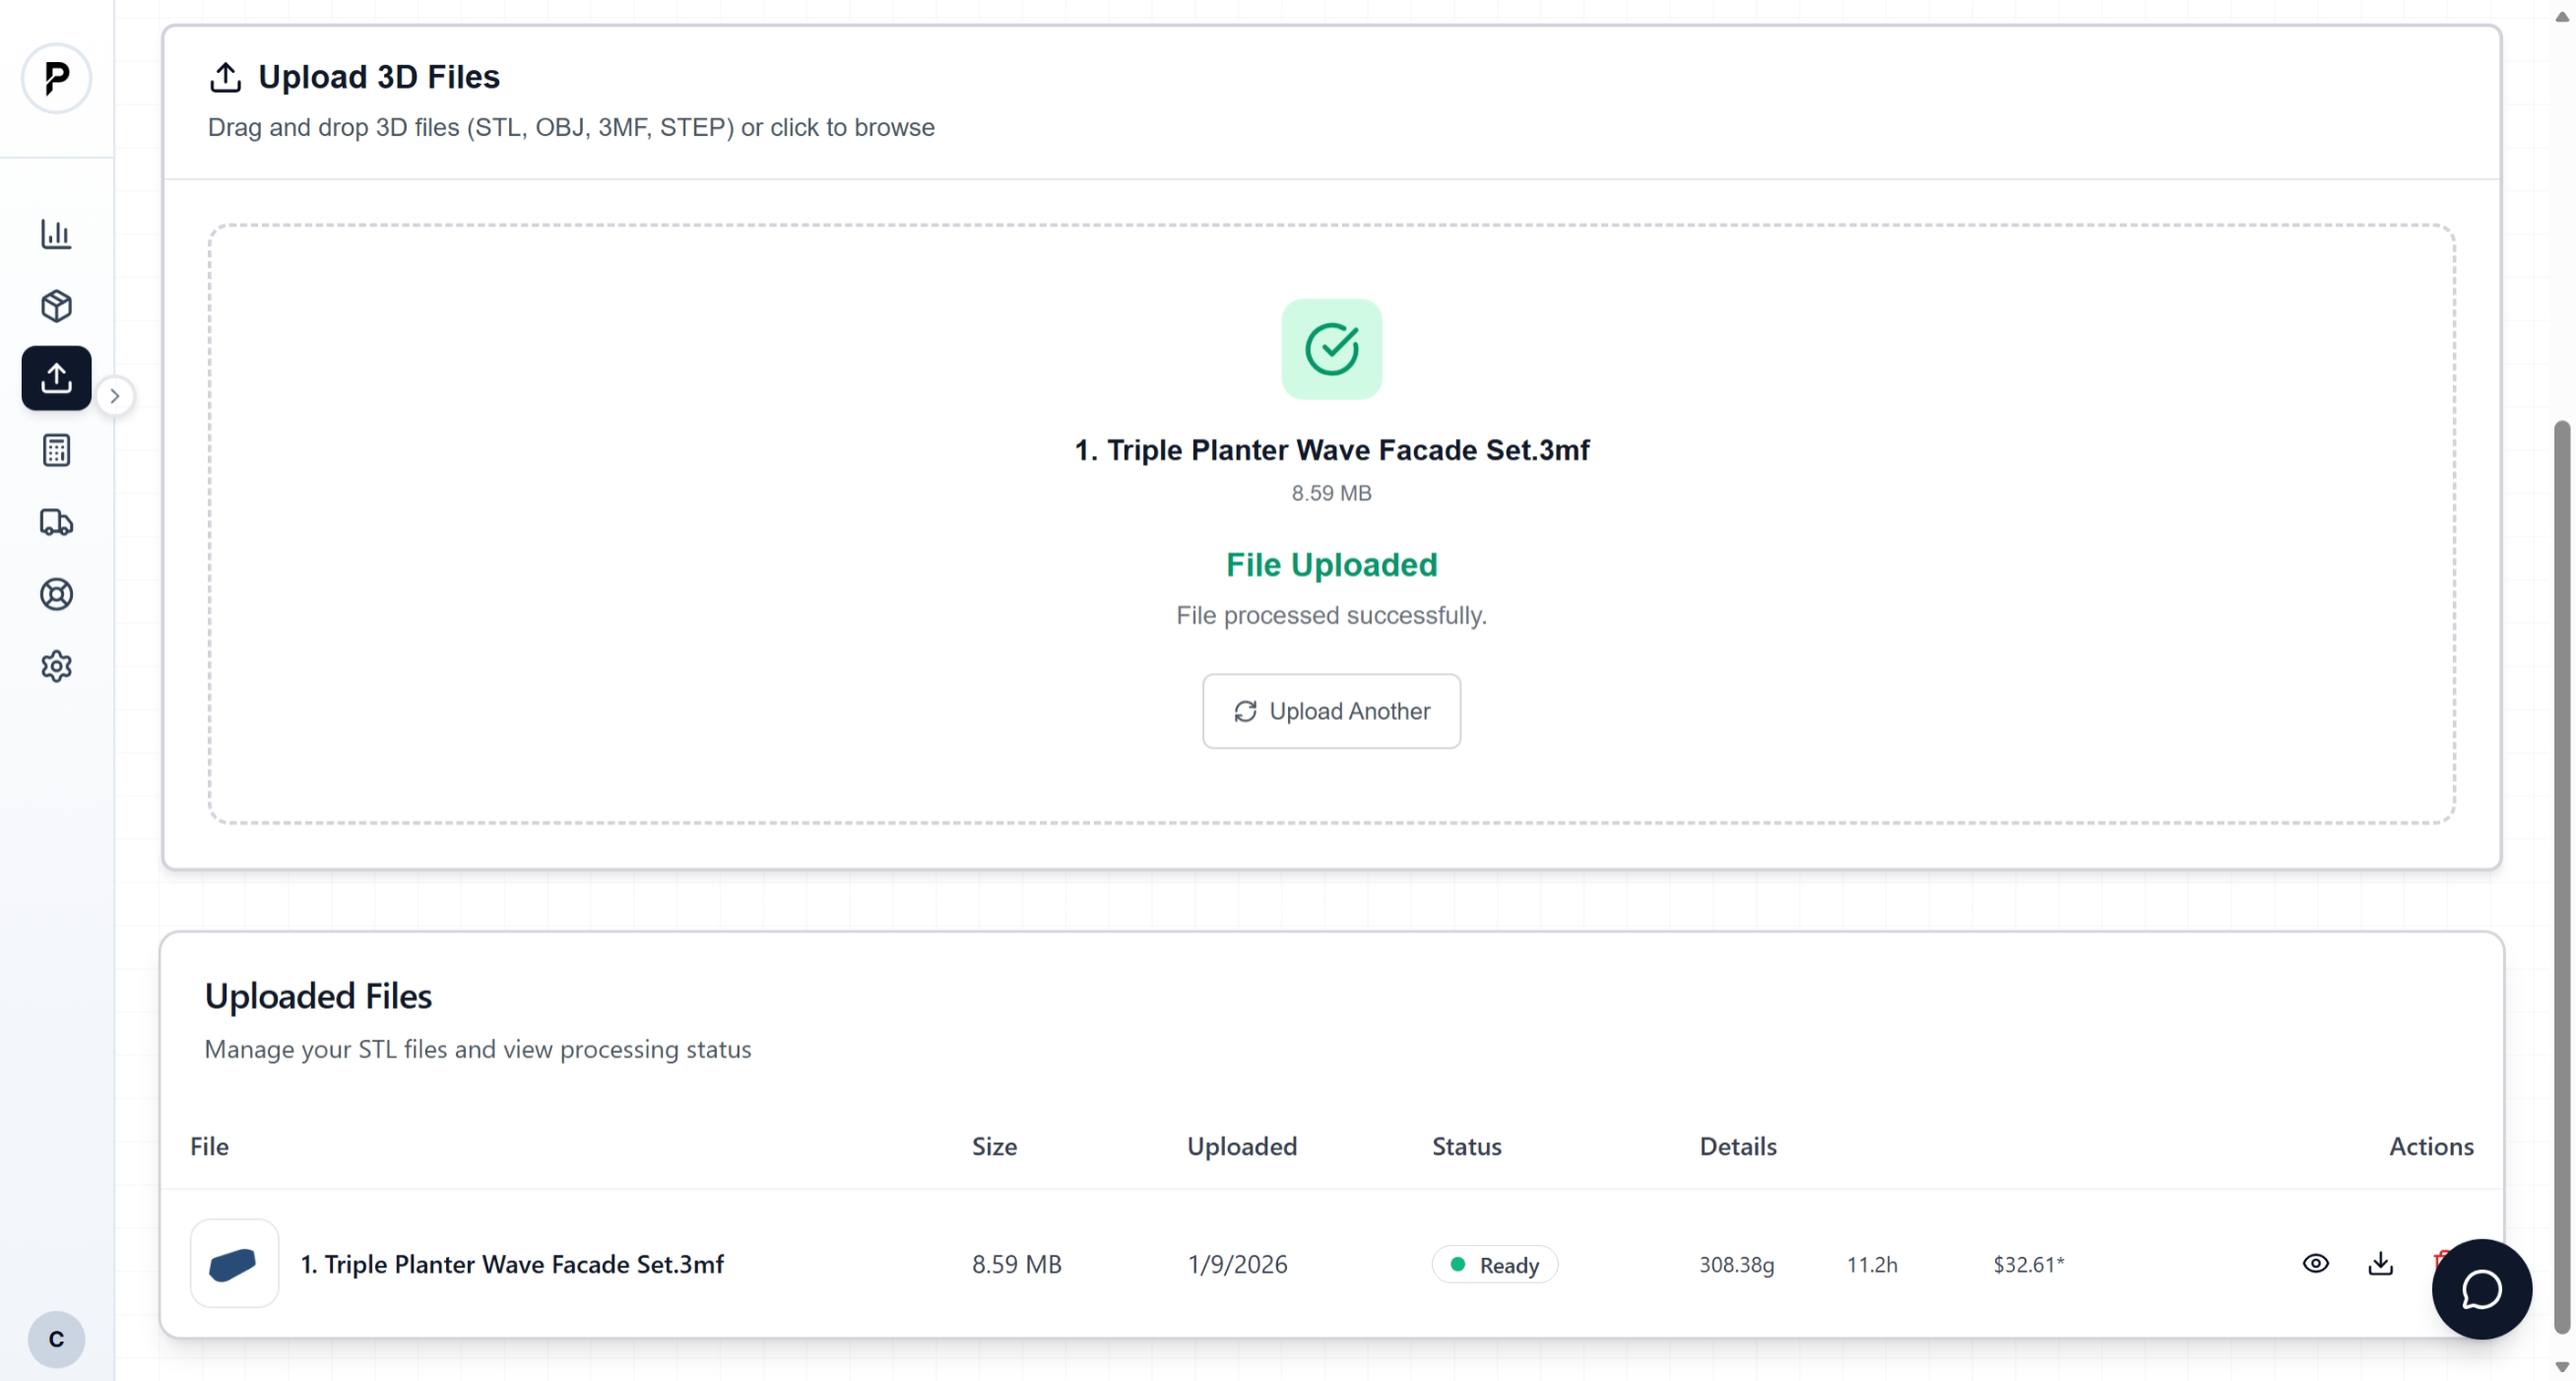
File analysis results with 3D preview, dimensions, and cost breakdown
File requirements
Step 2: Create a product
Now that your file is uploaded and analyzed, you can create a product from it.
Go to Products and click Add Product
Navigate to Products in the sidebar, then click the Add Product button.

Products page with Add Product button highlighted
Fill in basic product details
Enter your product information:
The name for this product in your dashboard.
Must match your store's SKU exactly. This is how orders get matched to products for fulfillment.
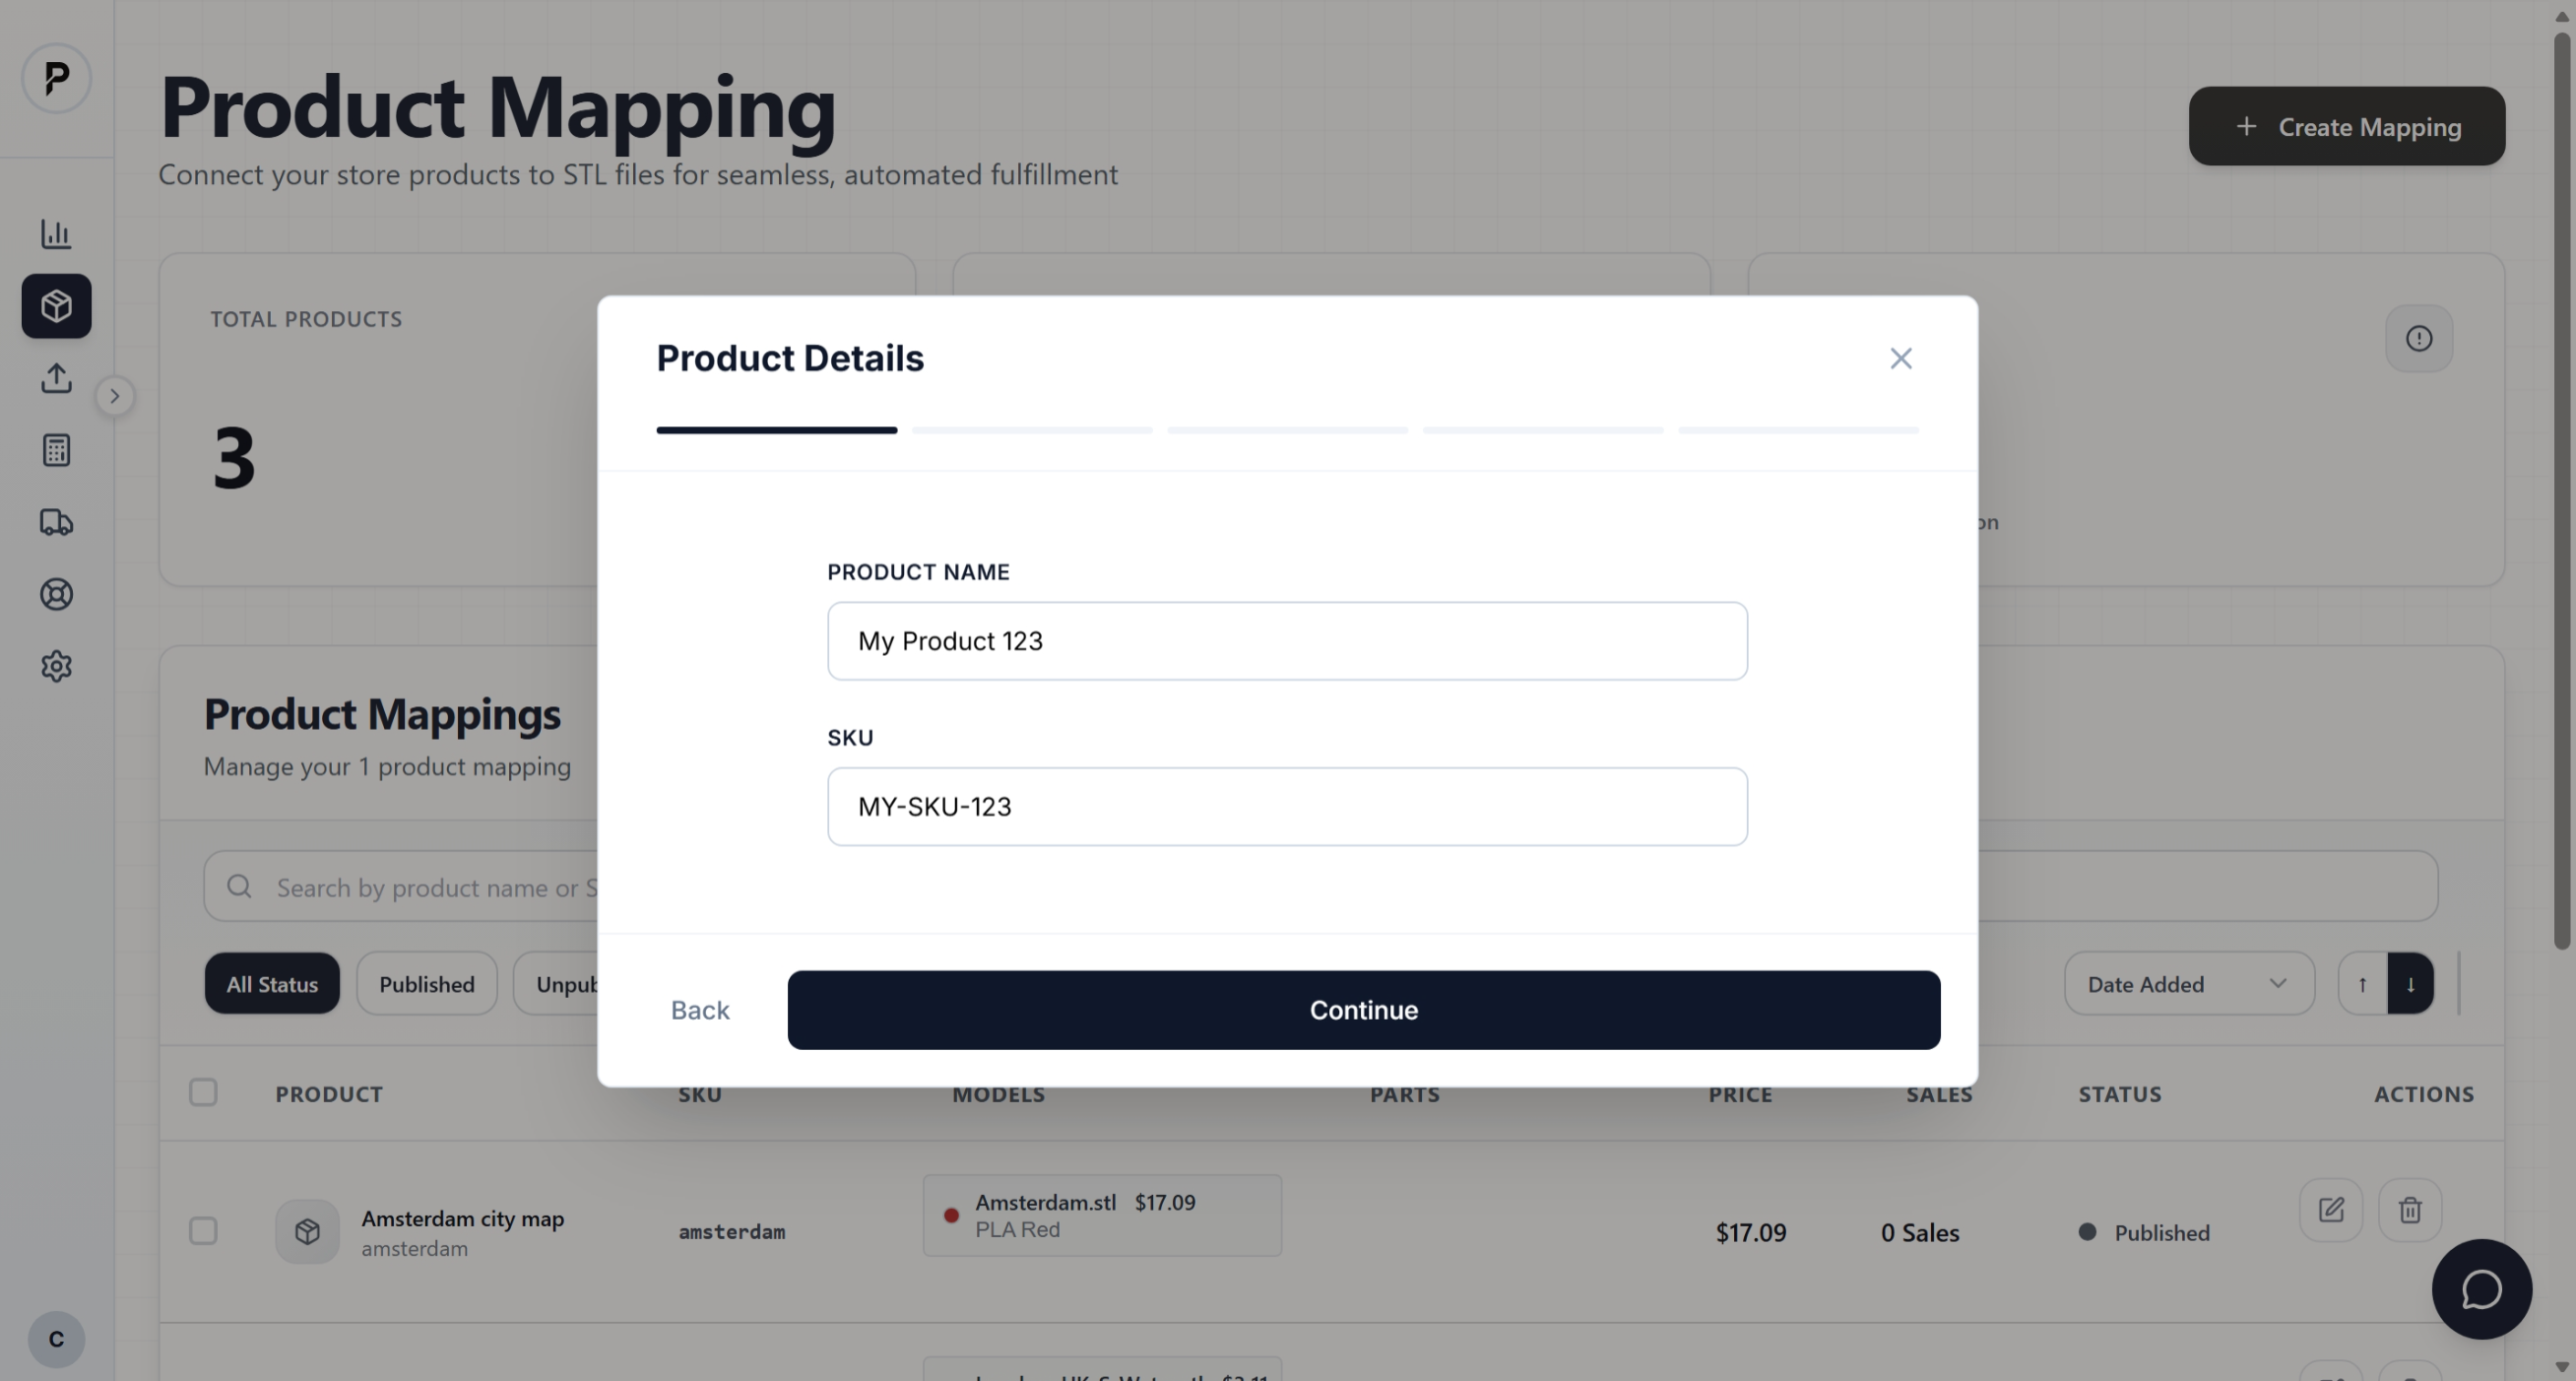
Product creation form with fields for name and SKU
Select files from your library
Choose the 3D file(s) you want to use for this product. You'll see a preview with the production cost already calculated.
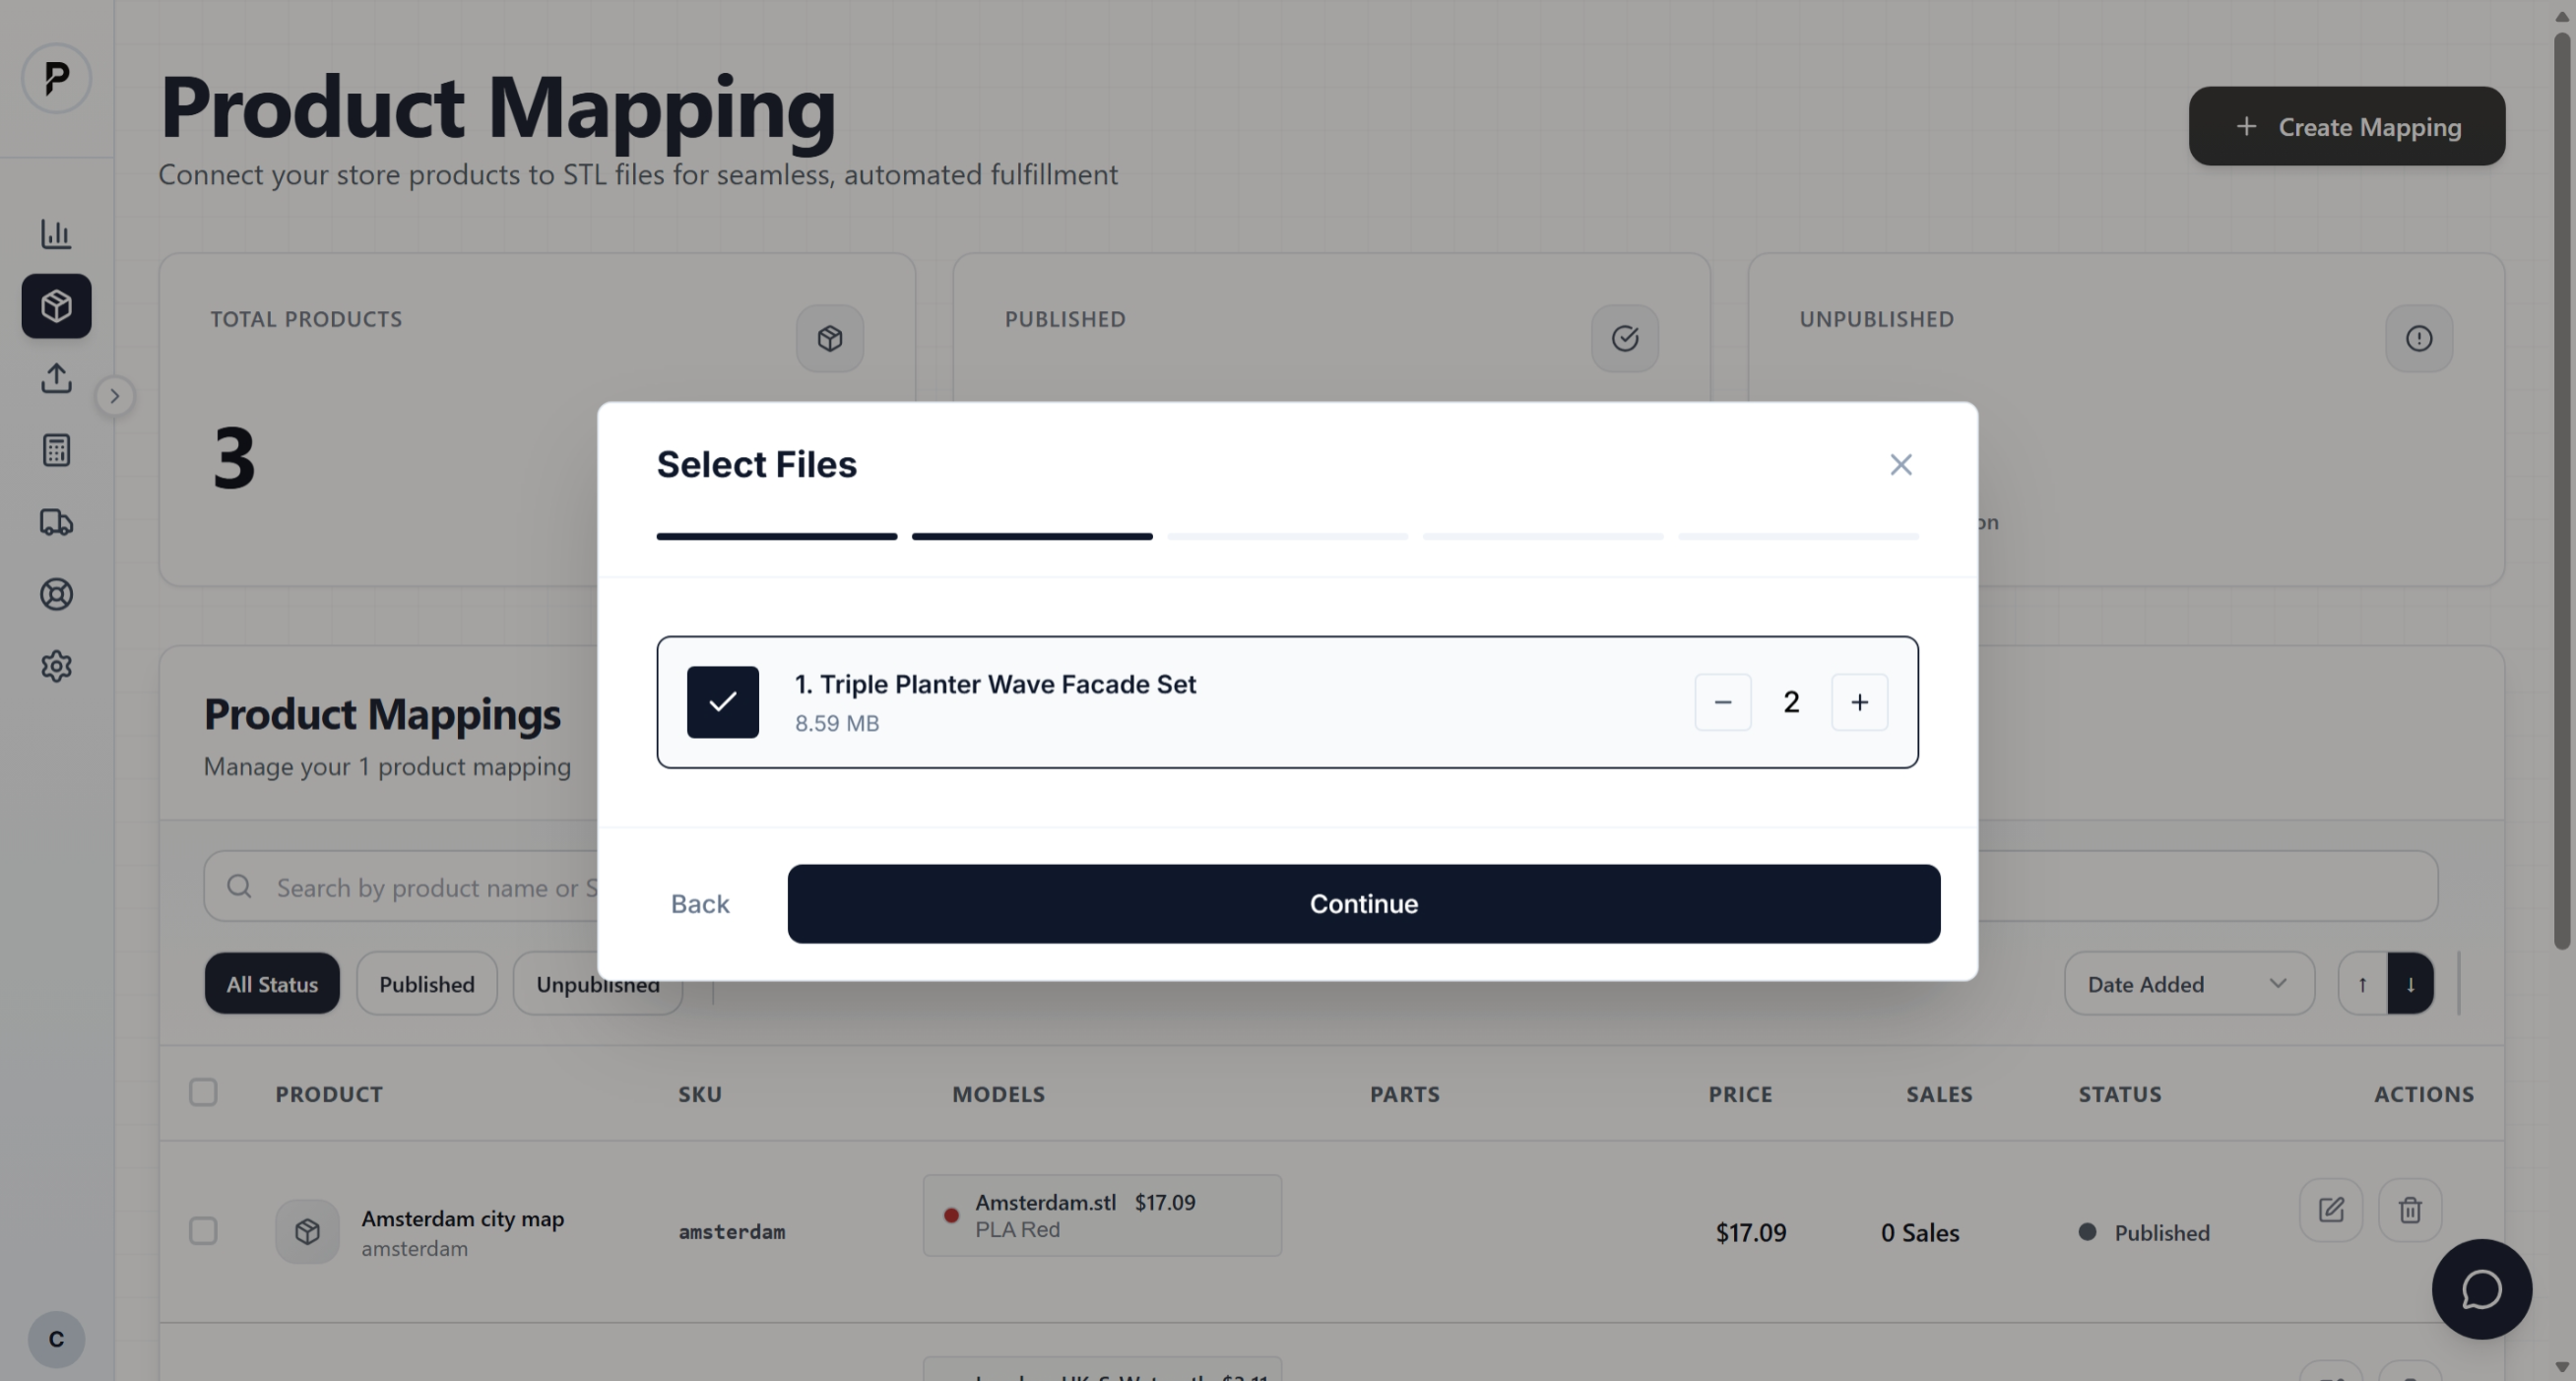
File selection modal showing uploaded files with thumbnails and costs
Configure materials and options
After selecting your files, choose the material type and color for each part. The production cost updates automatically based on your selections.
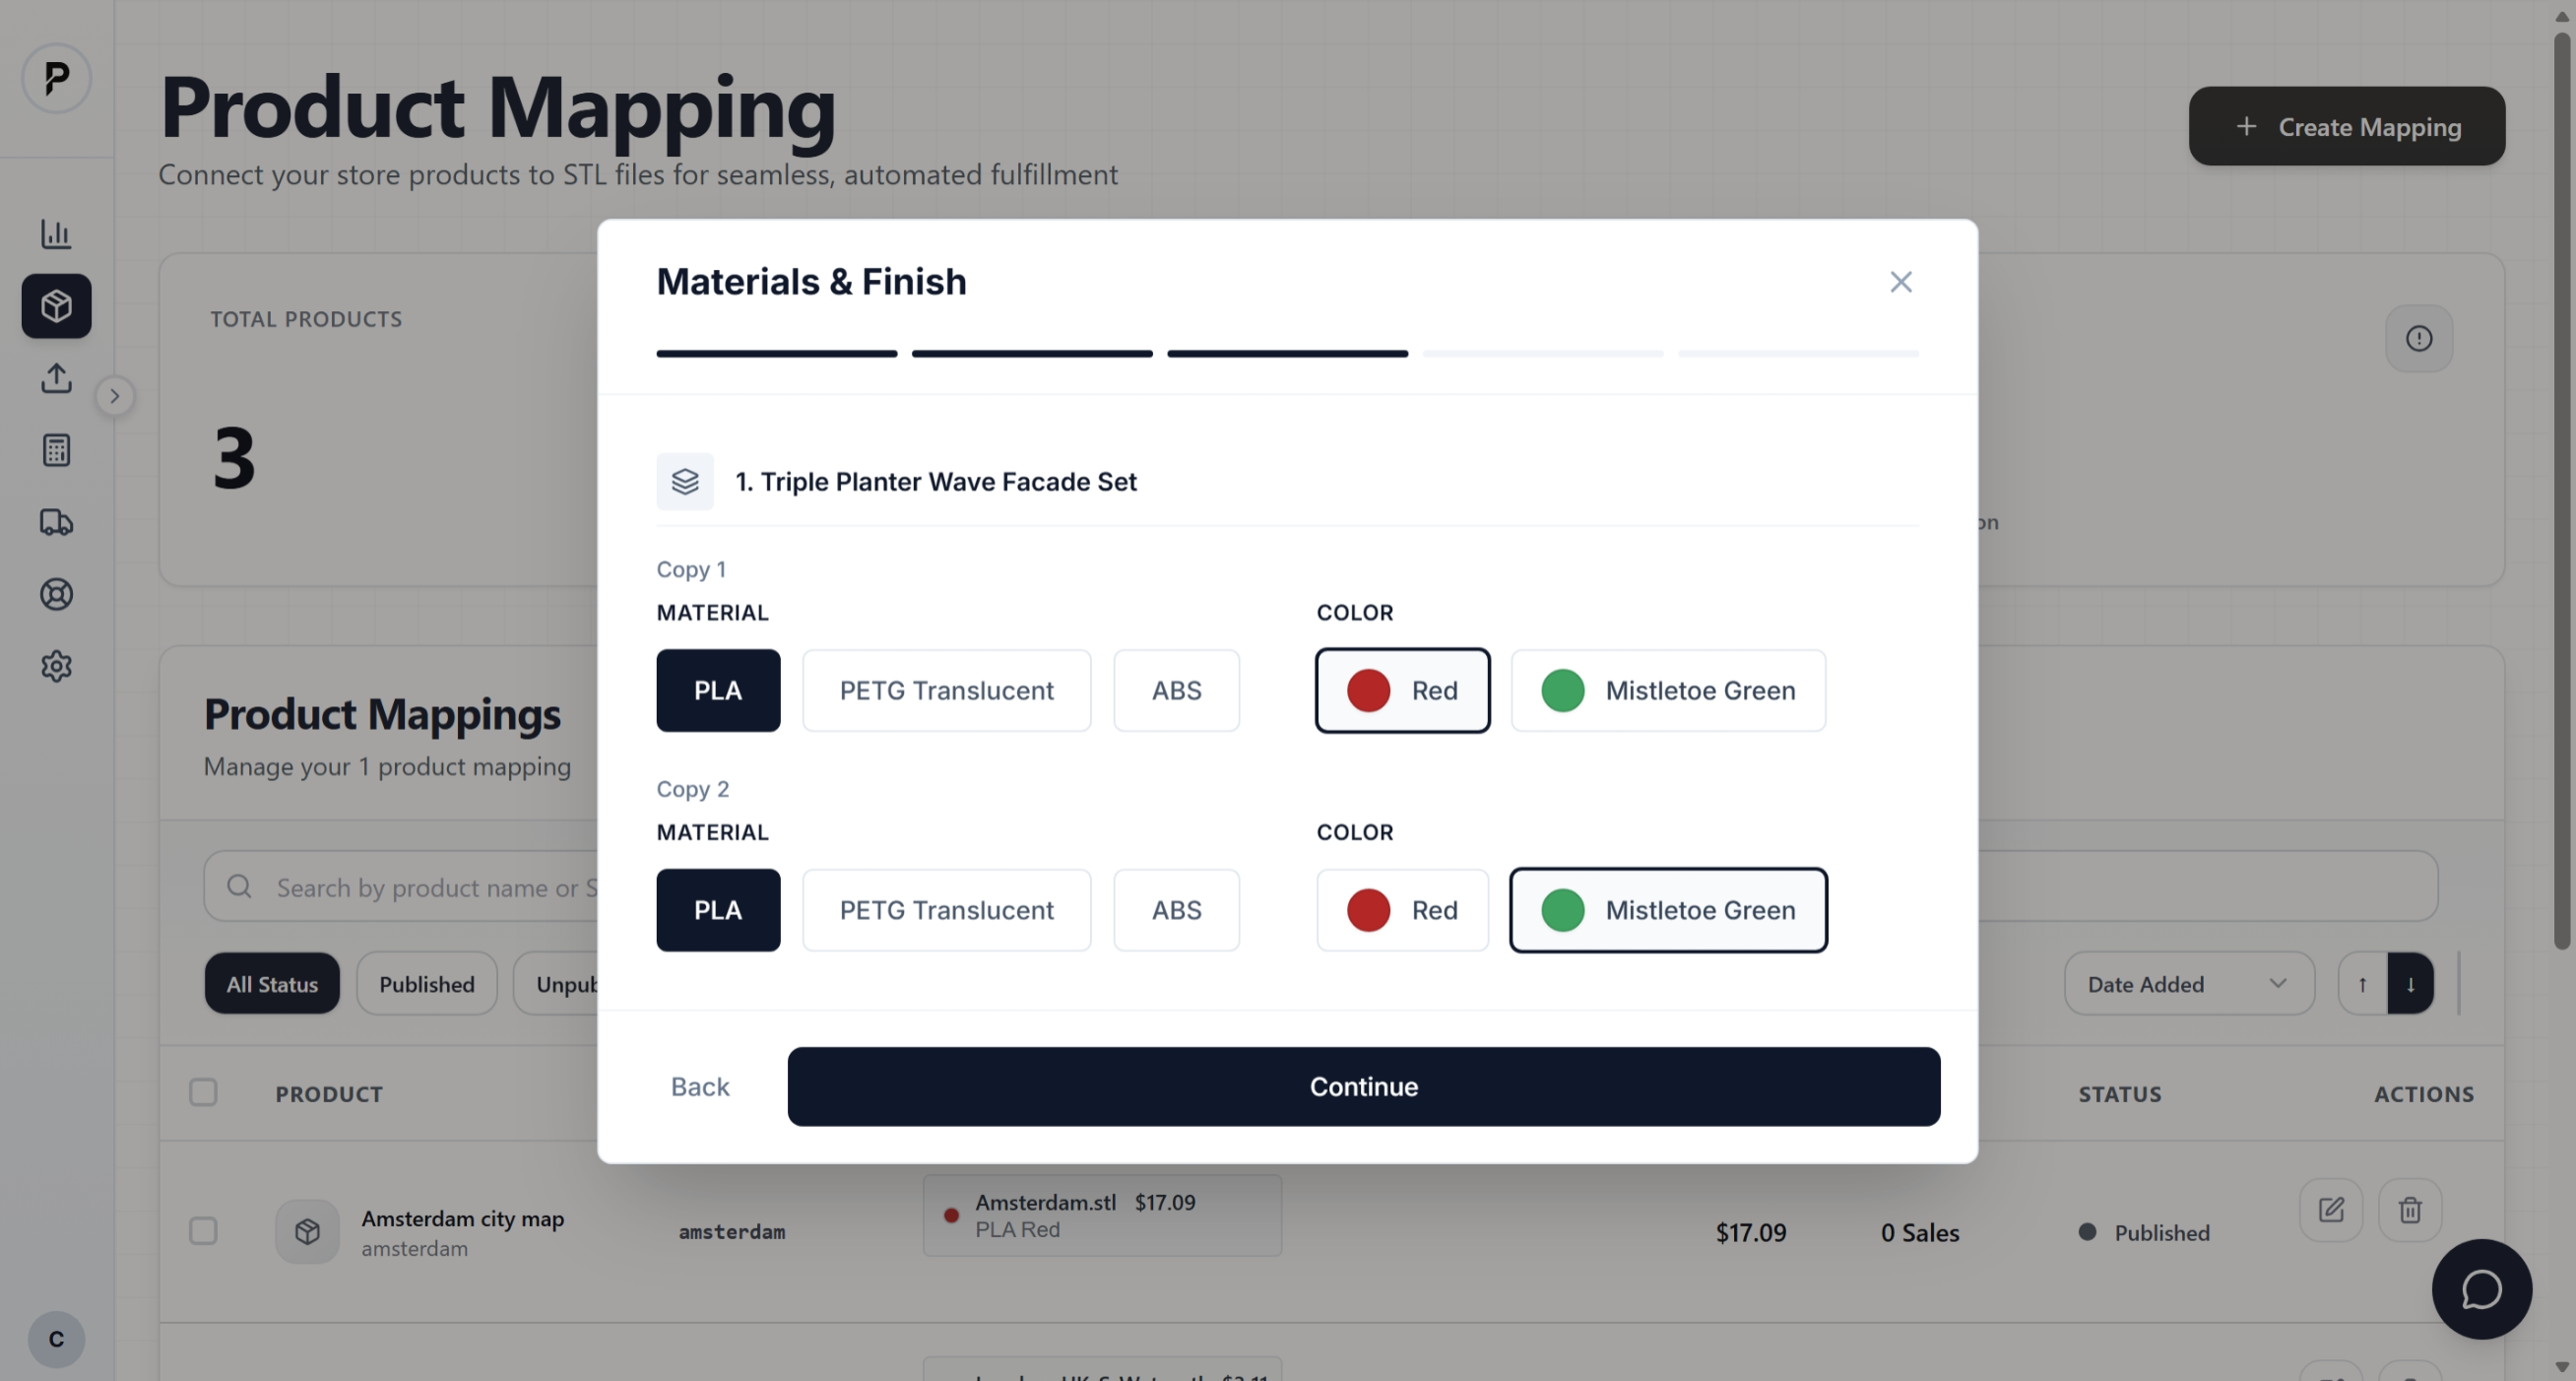
Materials selection screen
Add hardware components (optional)
If your product needs screws, LEDs, or other components, add them here. The cost is included in your production cost.

Hardware selection screen
Save the product
Review the production cost breakdown and click Save Product. Your product is now ready to receive orders.
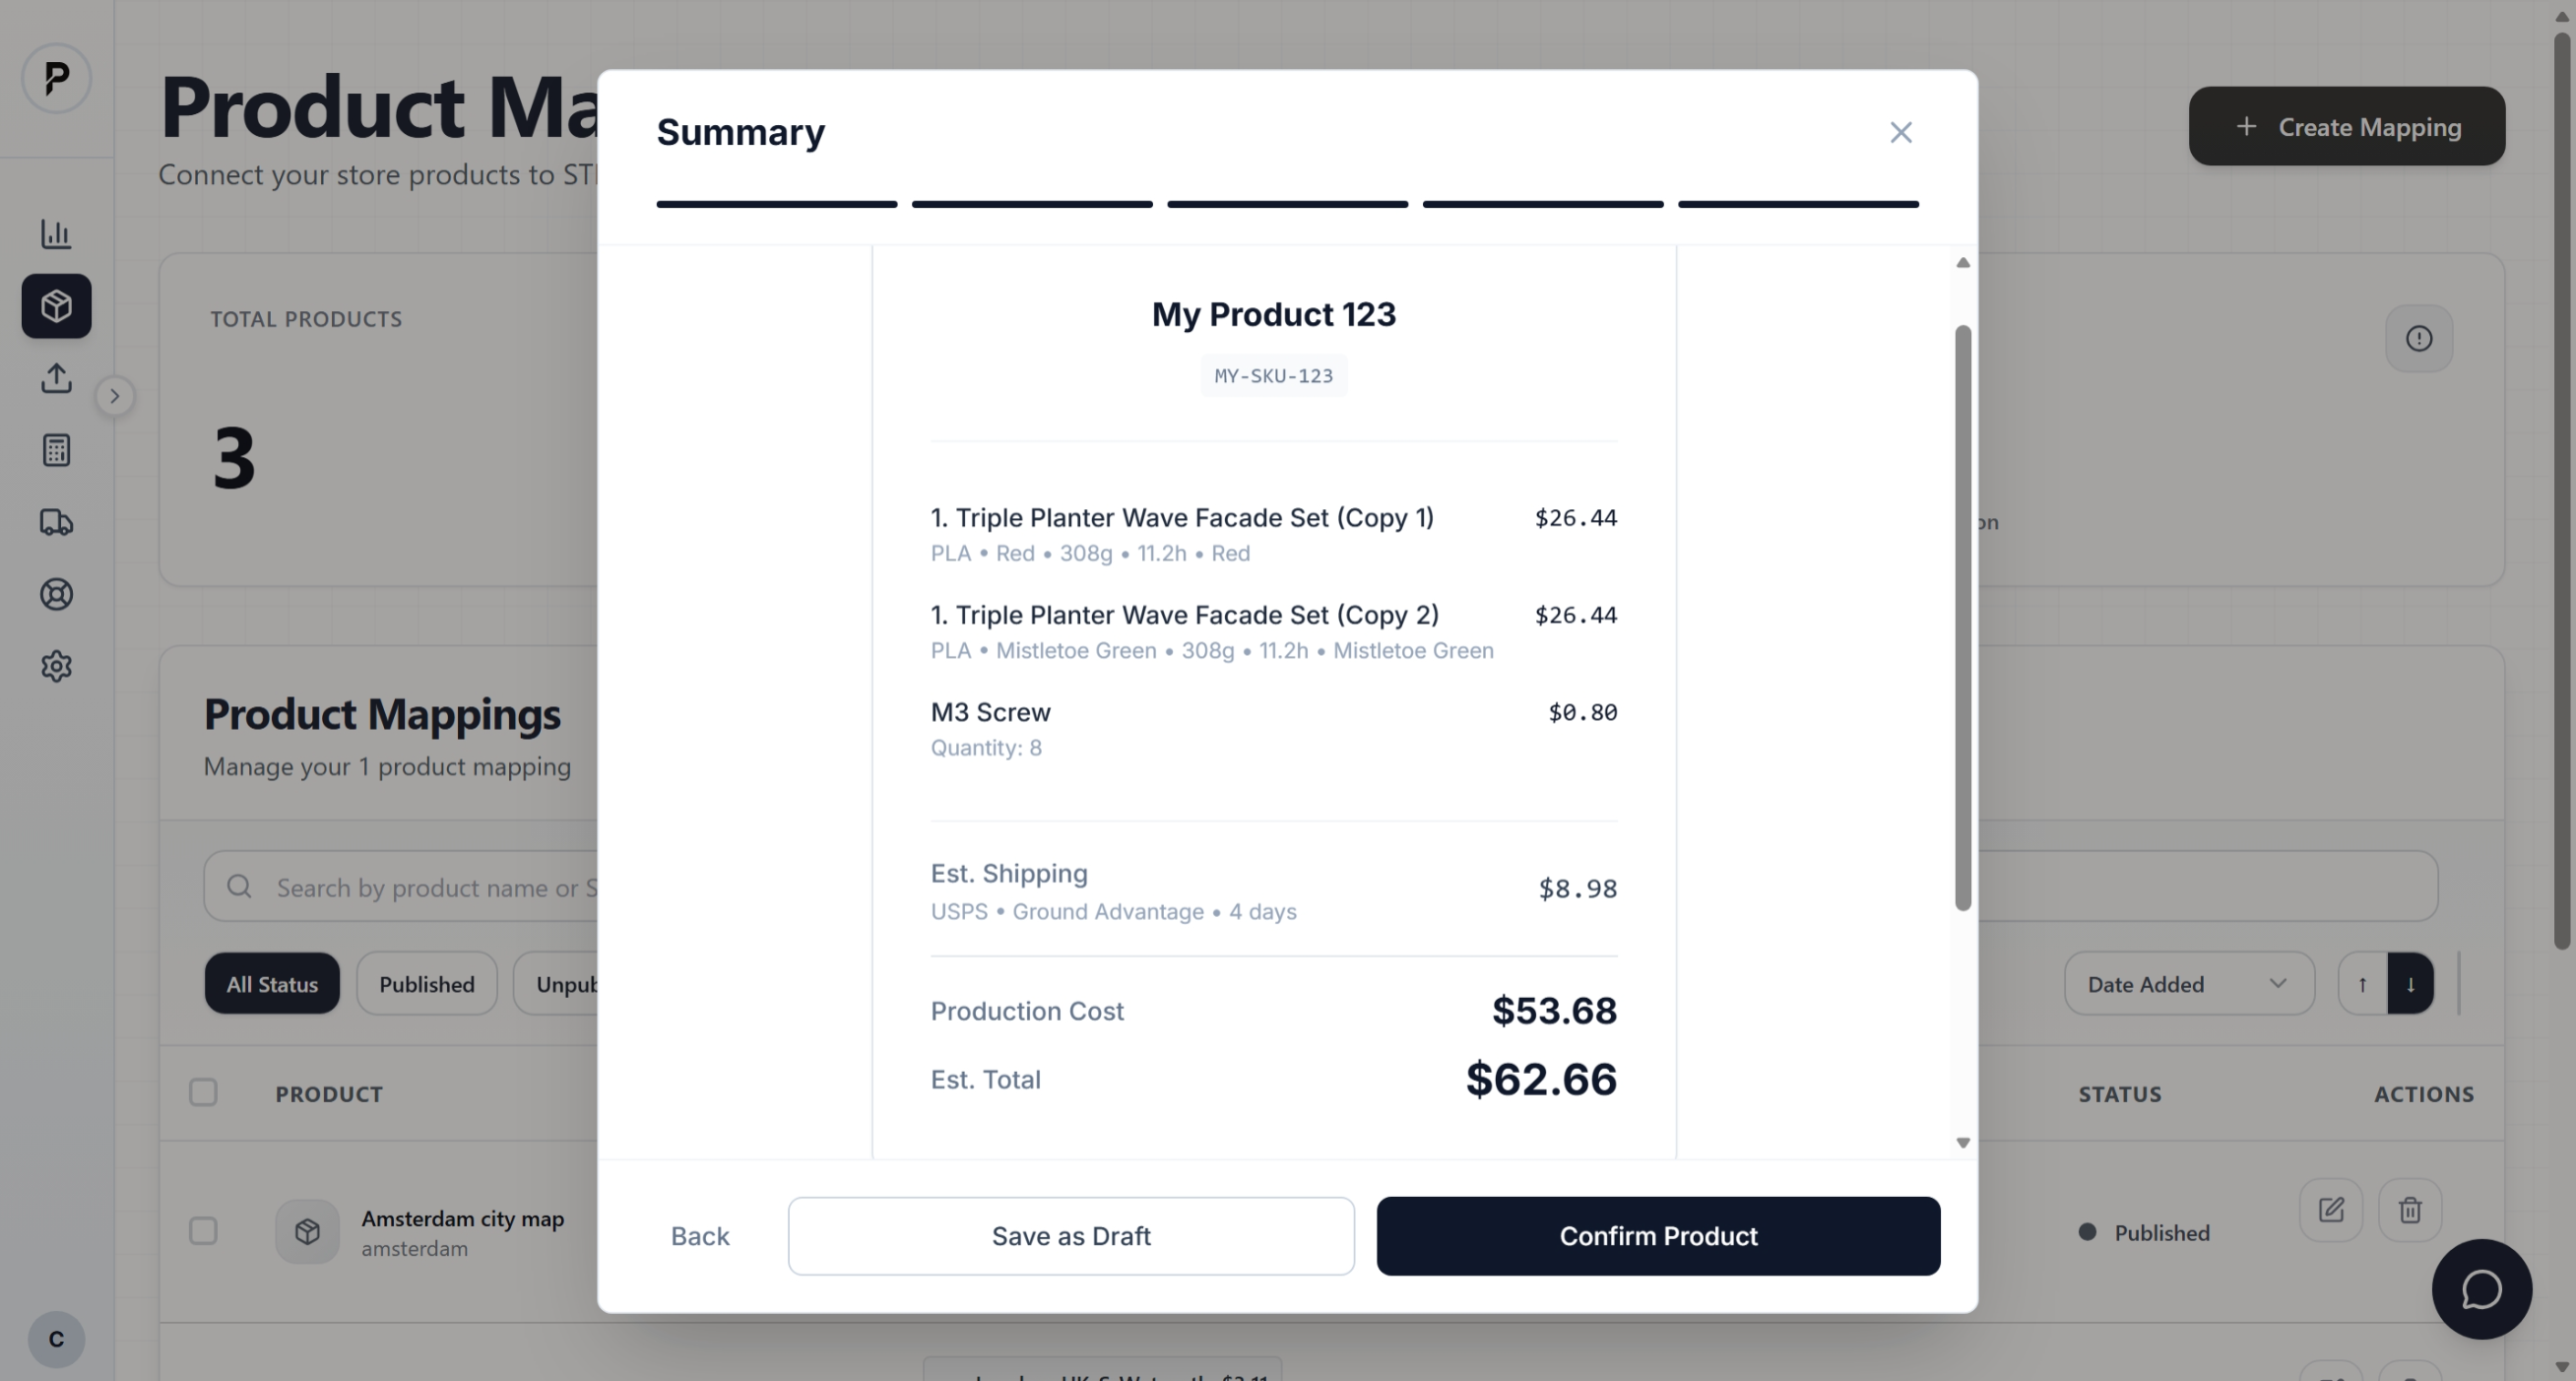
Success confirmation
Understanding SKU matching
The SKU is critical for automatic fulfillment. Here's how it works:
When an order comes in from your store, we match the SKU to find the right product and start production automatically. If SKUs don't match, you'll need to manually assign the file.
SKU must match exactly
Setting your price
When creating a product, you set the retail price. Your profit is the difference between your price and our production + shipping cost.
See Pricing & Costs for a detailed breakdown of how costs are calculated and strategies for maximizing your margins.
What happens next
Once your product is created:
Tips for success
Use descriptive SKUs
Instead of "001", use "PLANTER-GEO-WHT" — includes product type, style, and variant.
Test with a sample order
Place a test order yourself to see the full flow and verify print quality before going live.
Keep files organized
Use clear file names. "geometric_planter_v2_final.stl" is better than "model.stl".
Check dimensions before uploading
Ensure your file is scaled correctly in your 3D software. We print at the size the file specifies.