Your Files
Where your designs live, what their statuses mean, and how to delete one.
5 min read
Every 3D file you upload or generate lands in your Files, a list of measured, priced building blocks that are ready to become products. This page explains how to read that list, what the status indicator means, and when a design cannot be deleted.
Where to find the Files tab
The Files is a tab inside your Catalog, which you open from /products in the workspace sidebar. The Catalog has two tabs, Products and Files, each showing a count. The hero strip at the top of the page keeps a running Designs tally.
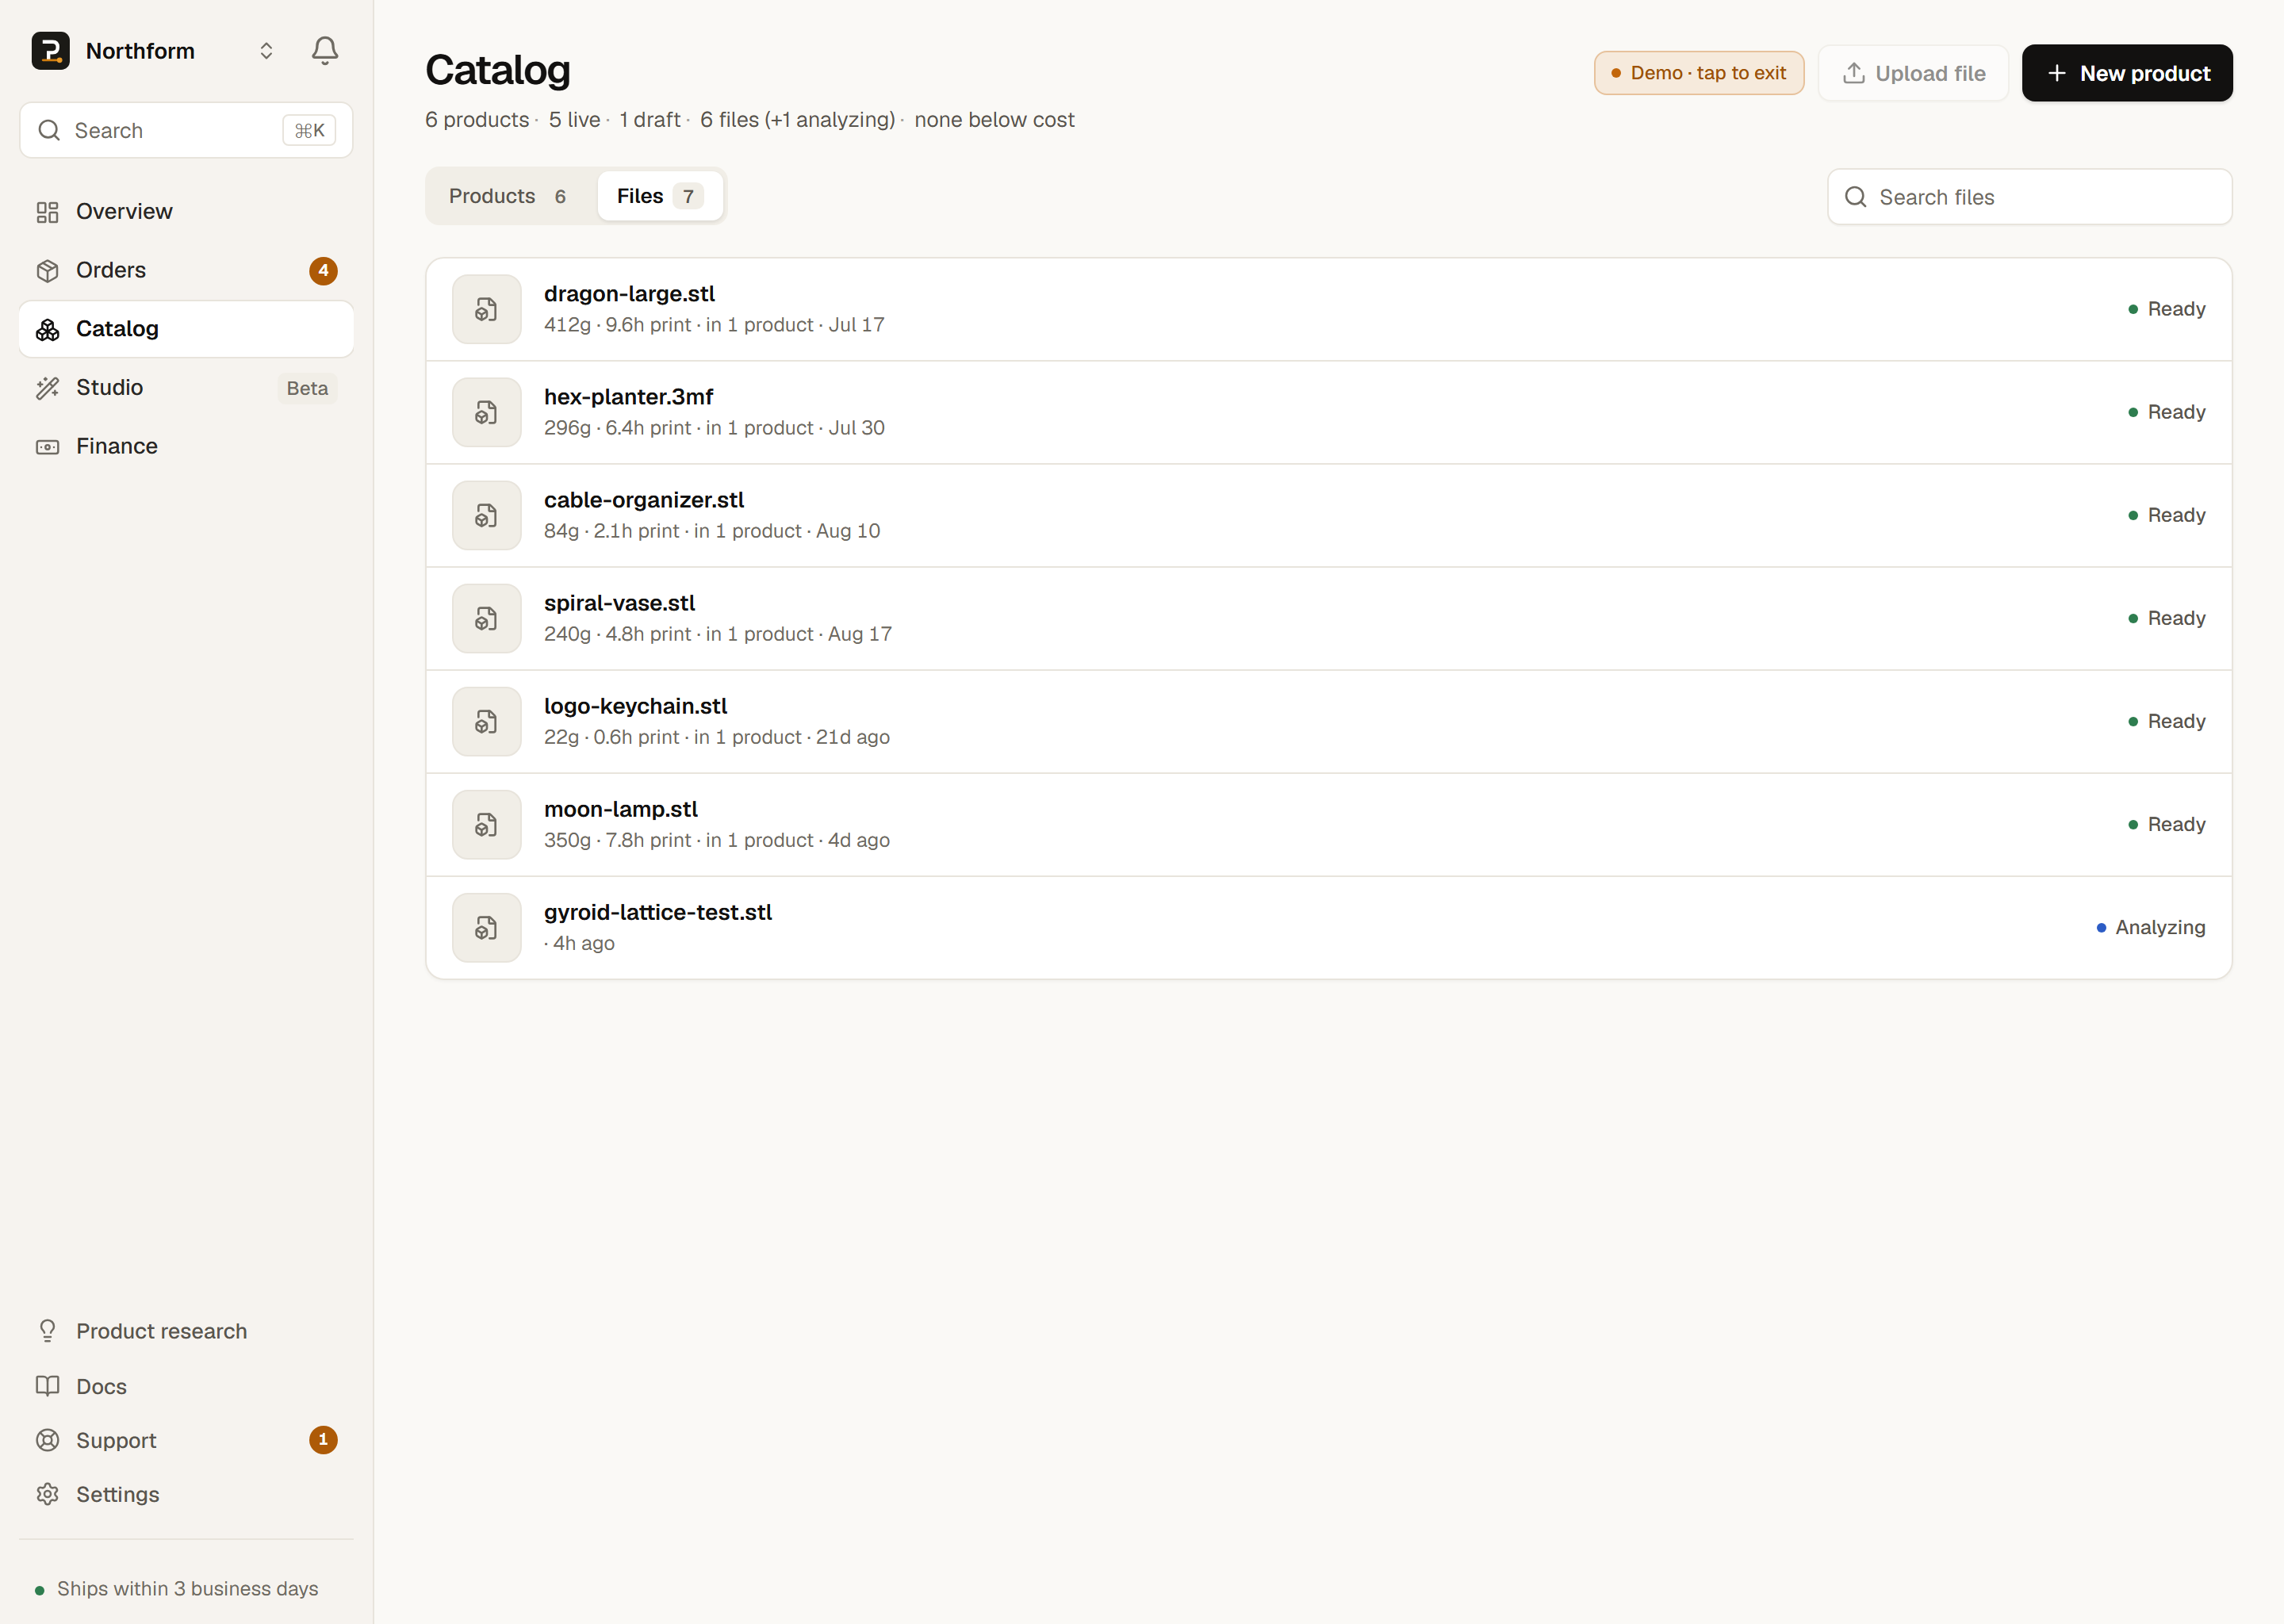
A design is a single 3D file: measured raw material with no price and no SKU of its own. You create one by uploading a model or by generating one in Studio. There is no separate upload page; every design lives here in the Catalog. The search box on this tab filters your designs by name.
A design is not a product
What each row shows
Each design appears as one row. Read left to right, a row contains:
- Thumbnail
- A small preview of the model. It begins as a quick preview and later swaps to a cleaner render, described below.
- Name
- The file name, so you can tell your designs apart.
- Weightgrams
- The grams of filament one print uses, taken from analysis. Your material cost is calculated from this number.
- Print time
- The approximate time one copy takes to print.
- In N productsusage
- How many of your products currently include this design. This count also determines whether the design can be deleted.
- Uploaded
- How long ago the design was added to your library.
- Status
- A colored dot and label, either Ready, Analyzing, or Failed, indicating where the file is in analysis.
Thumbnails
The first thumbnail is a quick 3D preview drawn in your browser the moment you select the file. It appears instantly, before analysis starts. Once analysis finishes, PrintPort3D replaces it with a cleaner, photo-style render of the model. If the quick preview fails to draw, a plain file icon stands in until the render arrives. This never blocks your upload.
Design statuses
The status indicates whether a design is ready to build with, still being measured, or has a problem.
The status on every Files row.
| Status | What it means | Can you build with it? |
|---|---|---|
| Analyzing | Just uploaded. The slicer is measuring weight, print time, size, and printability. | Not yet. Wait for Ready. |
| Ready | Analyzed and priced. Weight, print time, and dimensions are recorded. | Yes. It can go into a product. |
| Failed | Analysis could not finish, usually because the model is too large, too small, empty, or unreadable. | No. Fix the file and upload again. |
- AnalyzingWhat it meansJust uploaded. The slicer is measuring weight, print time, size, and printability.Can you build with it?Not yet. Wait for Ready.
- ReadyWhat it meansAnalyzed and priced. Weight, print time, and dimensions are recorded.Can you build with it?Yes. It can go into a product.
- FailedWhat it meansAnalysis could not finish, usually because the model is too large, too small, empty, or unreadable.Can you build with it?No. Fix the file and upload again.
Only a Ready design can be added to a product. An Analyzing design is not selectable in the product composer until it finishes. Analysis usually takes a short moment, and the status updates on its own when it completes, with no refresh needed.
A Failed design has a fixable cause
Why measurements use a PLA baseline
Every design is analyzed by slicing it once in PLA. The weight and print time shown in the library are therefore the real numbers for PLA. They are an accurate starting point for any material, but not the final figure for a different one, since a denser or slower filament changes both values.
No action is required here. When you build a product and select a non-PLA material, PrintPort3D automatically re-slices the design for that exact filament. While the re-slice runs, the composer shows the PLA baseline figure clearly flagged as an estimate, then updates it to the accurate value on its own when the result is ready.
Where material-accurate numbers appear
Deleting a design
Every row has a trash button. Hover it to see a tooltip listing any products that use this design. Deleting a design that nothing depends on removes it permanently.
PrintPort3D will not delete a design that is still in use. Two conditions count as in use:
- It is part of a product. The delete is blocked and the message names the products using it. Remove the design from those products first, then delete it.
- It is referenced by an order. A design attached to any past order cannot be deleted, so that your order history stays intact.
Delete protection is enforced by the server
To remove a design that is tied to a live product, open that product and either swap the design out or delete the product, which frees the design. Managing products is covered on Manage your catalog.