Get started: the setup steps
The five setup steps — two to try the service, three to connect your order path — what each one enables, and where to complete it.
4 min read
There is no setup wizard. After you verify your email you land on Overview, which shows Get started: five steps in two groups, and the next one opened up. Nothing in setup blocks the rest of the workspace — you can upload, price and publish at any time.
Verify your email first
Email verification is the one gate that comes before everything else. If you signed up with Google, your email is already verified. If you signed up with an email and password, open the message we sent and click the link; the verify page advances on its own. If the message has not arrived, resend it and check your spam folder.
Verification unlocks the workspace
For the complete sign-up walkthrough, see Create your account.
The five steps
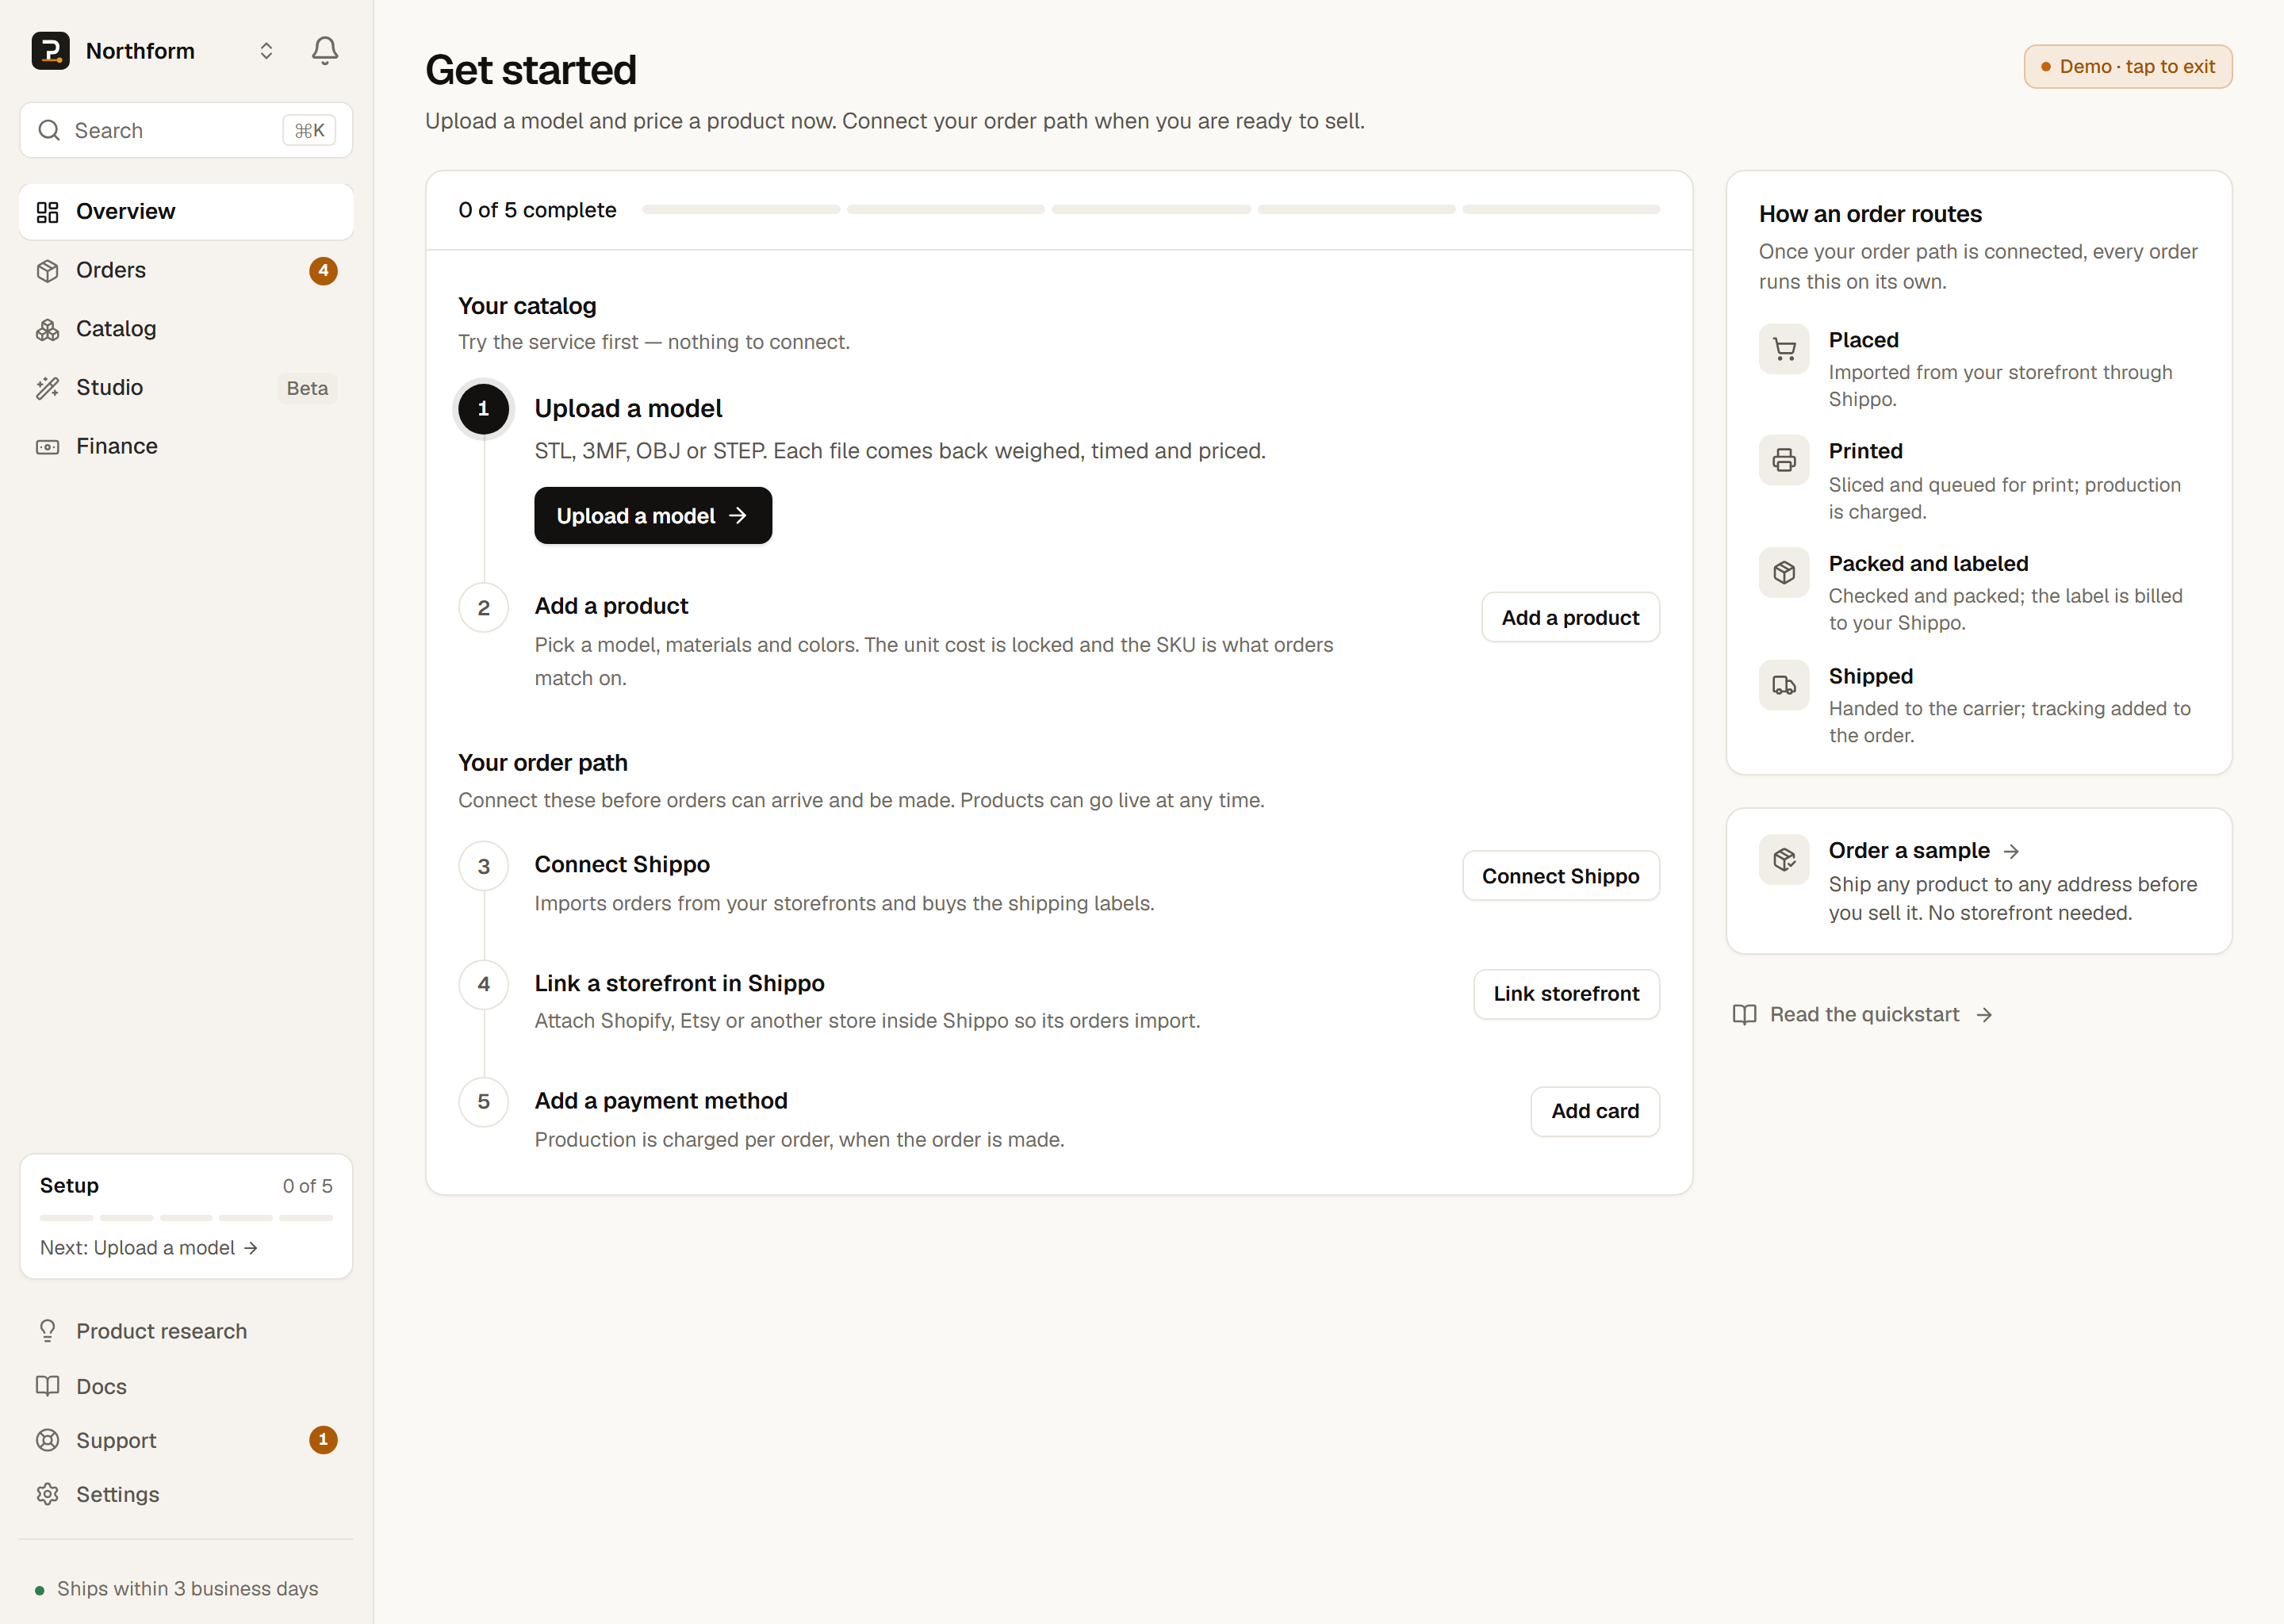
Your catalog — try the service first. Nothing to connect.
- 1
Upload a model
An STL, 3MF, OBJ or STEP file. Each one comes back weighed, timed and priced, so you see the unit cost before you sell anything. See Upload a design. - 2
Add a product
Pick a model, materials and colors; the unit cost is locked and the SKU is what incoming orders match on. The step completes when a product is live — orders for a draft’s SKU arrive unmatched, so a draft offers Publish instead. See Create a product.
Your order path — connect these before orders can arrive and be made.
- 3
Connect Shippo
PrintPort3D imports your orders through Shippo, and buys the labels on it; there are no direct store integrations. Authorize Shippo once, from Settings → Connections. See Connect Shippo. - 4
Link a storefront in Shippo
In Shippo’s dashboard, attach the storefront you sell on, so its orders import. PrintPort3D marks this complete from evidence — a store visible on your connected Shippo account, or your first order arriving. A store linked in a Shippo account you have not connected yet shows as Waiting on Shippo. See Link your store in Shippo. - 5
Add a payment method
The card production is charged to, per order, when the order is made — in Settings → Billing. See Add your payment card.
PrintPort3D charges your card the production cost (material plus labor, at least $2.00 per order) when it makes an order. Your customer pays you through your own store; PrintPort3D issues no payout. See How you get paid.
Setup is complete when all of the following are true:
- Email verified
- A model uploaded
- A product live
- Shippo connected
- A storefront linked inside Shippo
- A card on file
What each step enables
The catalog steps let you try the service; the order path lets orders arrive and be made.
| Step | What it enables | Where to do it |
|---|---|---|
| Verify your email | Everything: the workspace, connections, and your card | The emailed link (Google accounts skip it) |
| 1 · Upload a model | A measured, priced file to build products from | Catalog → Files |
| 2 · Add a product | A SKU that incoming orders match on, once it is live | Catalog → New product |
| 3 · Connect Shippo | Orders importing, and labels bought on your Shippo account | Settings → Connections |
| 4 · Link a storefront in Shippo | Your storefront’s sales reaching your Orders page | The Shippo dashboard |
| 5 · Add a payment method | Orders being made — production is charged per order | Settings → Billing |
- Verify your emailWhat it enablesEverything: the workspace, connections, and your cardWhere to do itThe emailed link (Google accounts skip it)
- 1 · Upload a modelWhat it enablesA measured, priced file to build products fromWhere to do itCatalog → Files
- 2 · Add a productWhat it enablesA SKU that incoming orders match on, once it is liveWhere to do itCatalog → New product
- 3 · Connect ShippoWhat it enablesOrders importing, and labels bought on your Shippo accountWhere to do itSettings → Connections
- 4 · Link a storefront in ShippoWhat it enablesYour storefront’s sales reaching your Orders pageWhere to do itThe Shippo dashboard
- 5 · Add a payment methodWhat it enablesOrders being made — production is charged per orderWhere to do itSettings → Billing
Where setup shows
Overview shows Get started until setup is complete and your first order has arrived. Everywhere else, a small Setup card in the sidebar — and in the phone’s More sheet — shows how far you are (for example “2 of 5”) and names the next step; click it to go straight there. It cannot be dismissed, and it disappears once setup is done.
Each unfinished connection leaves exactly one thing off:
- Without Shippo, or with no storefront linked inside it, orders do not import. Nothing else is blocked — you can upload, price and take products Live — but no sale has a path to reach you until it is connected.
- Without a card, an order that arrives cannot be made, so it waits in Orders until you add one. Nothing is cancelled and nothing is charged before then.
Approval is on by default