Create a product
Turn a design into a priced, sellable product with a SKU.
6 min read
A design is a 3D file. A product is what you sell: one or more designs, printed in real materials, tied to a SKU and a make cost. You build a product in the Composer, a two-step form with a live price rail.
Before you start
Creating a product requires at least one design that has finished analyzing. In your Catalog’s Files tab, each design shows a status dot. Only designs marked Ready can go into a product; Analyzing and Failed designs cannot.
Uploading and building need only a verified email
If you have not uploaded a design yet, start with Upload a design. For why a design, a product, and a store listing are three separate objects, see Designs, Products & Listings.
Open the Composer
Go to your Catalog at /products in the sidebar. In the hero, click New product. This opens the ProductComposer, a single panel with two step tabs at the top:
- 1 · Build — select files, copies, materials, and any hardware.
- 2 · List it — set a name, a SKU, and an optional description.
The two tabs are views, not gates. You can move between them freely, and nothing is locked until you save. A receipt rail along the side prices every choice as you make it.
There is no “+” or “Add product” menu item
Step 1 · Build the unit
This step defines exactly what goes into one unit of your product: the physical item that ships when someone orders it.
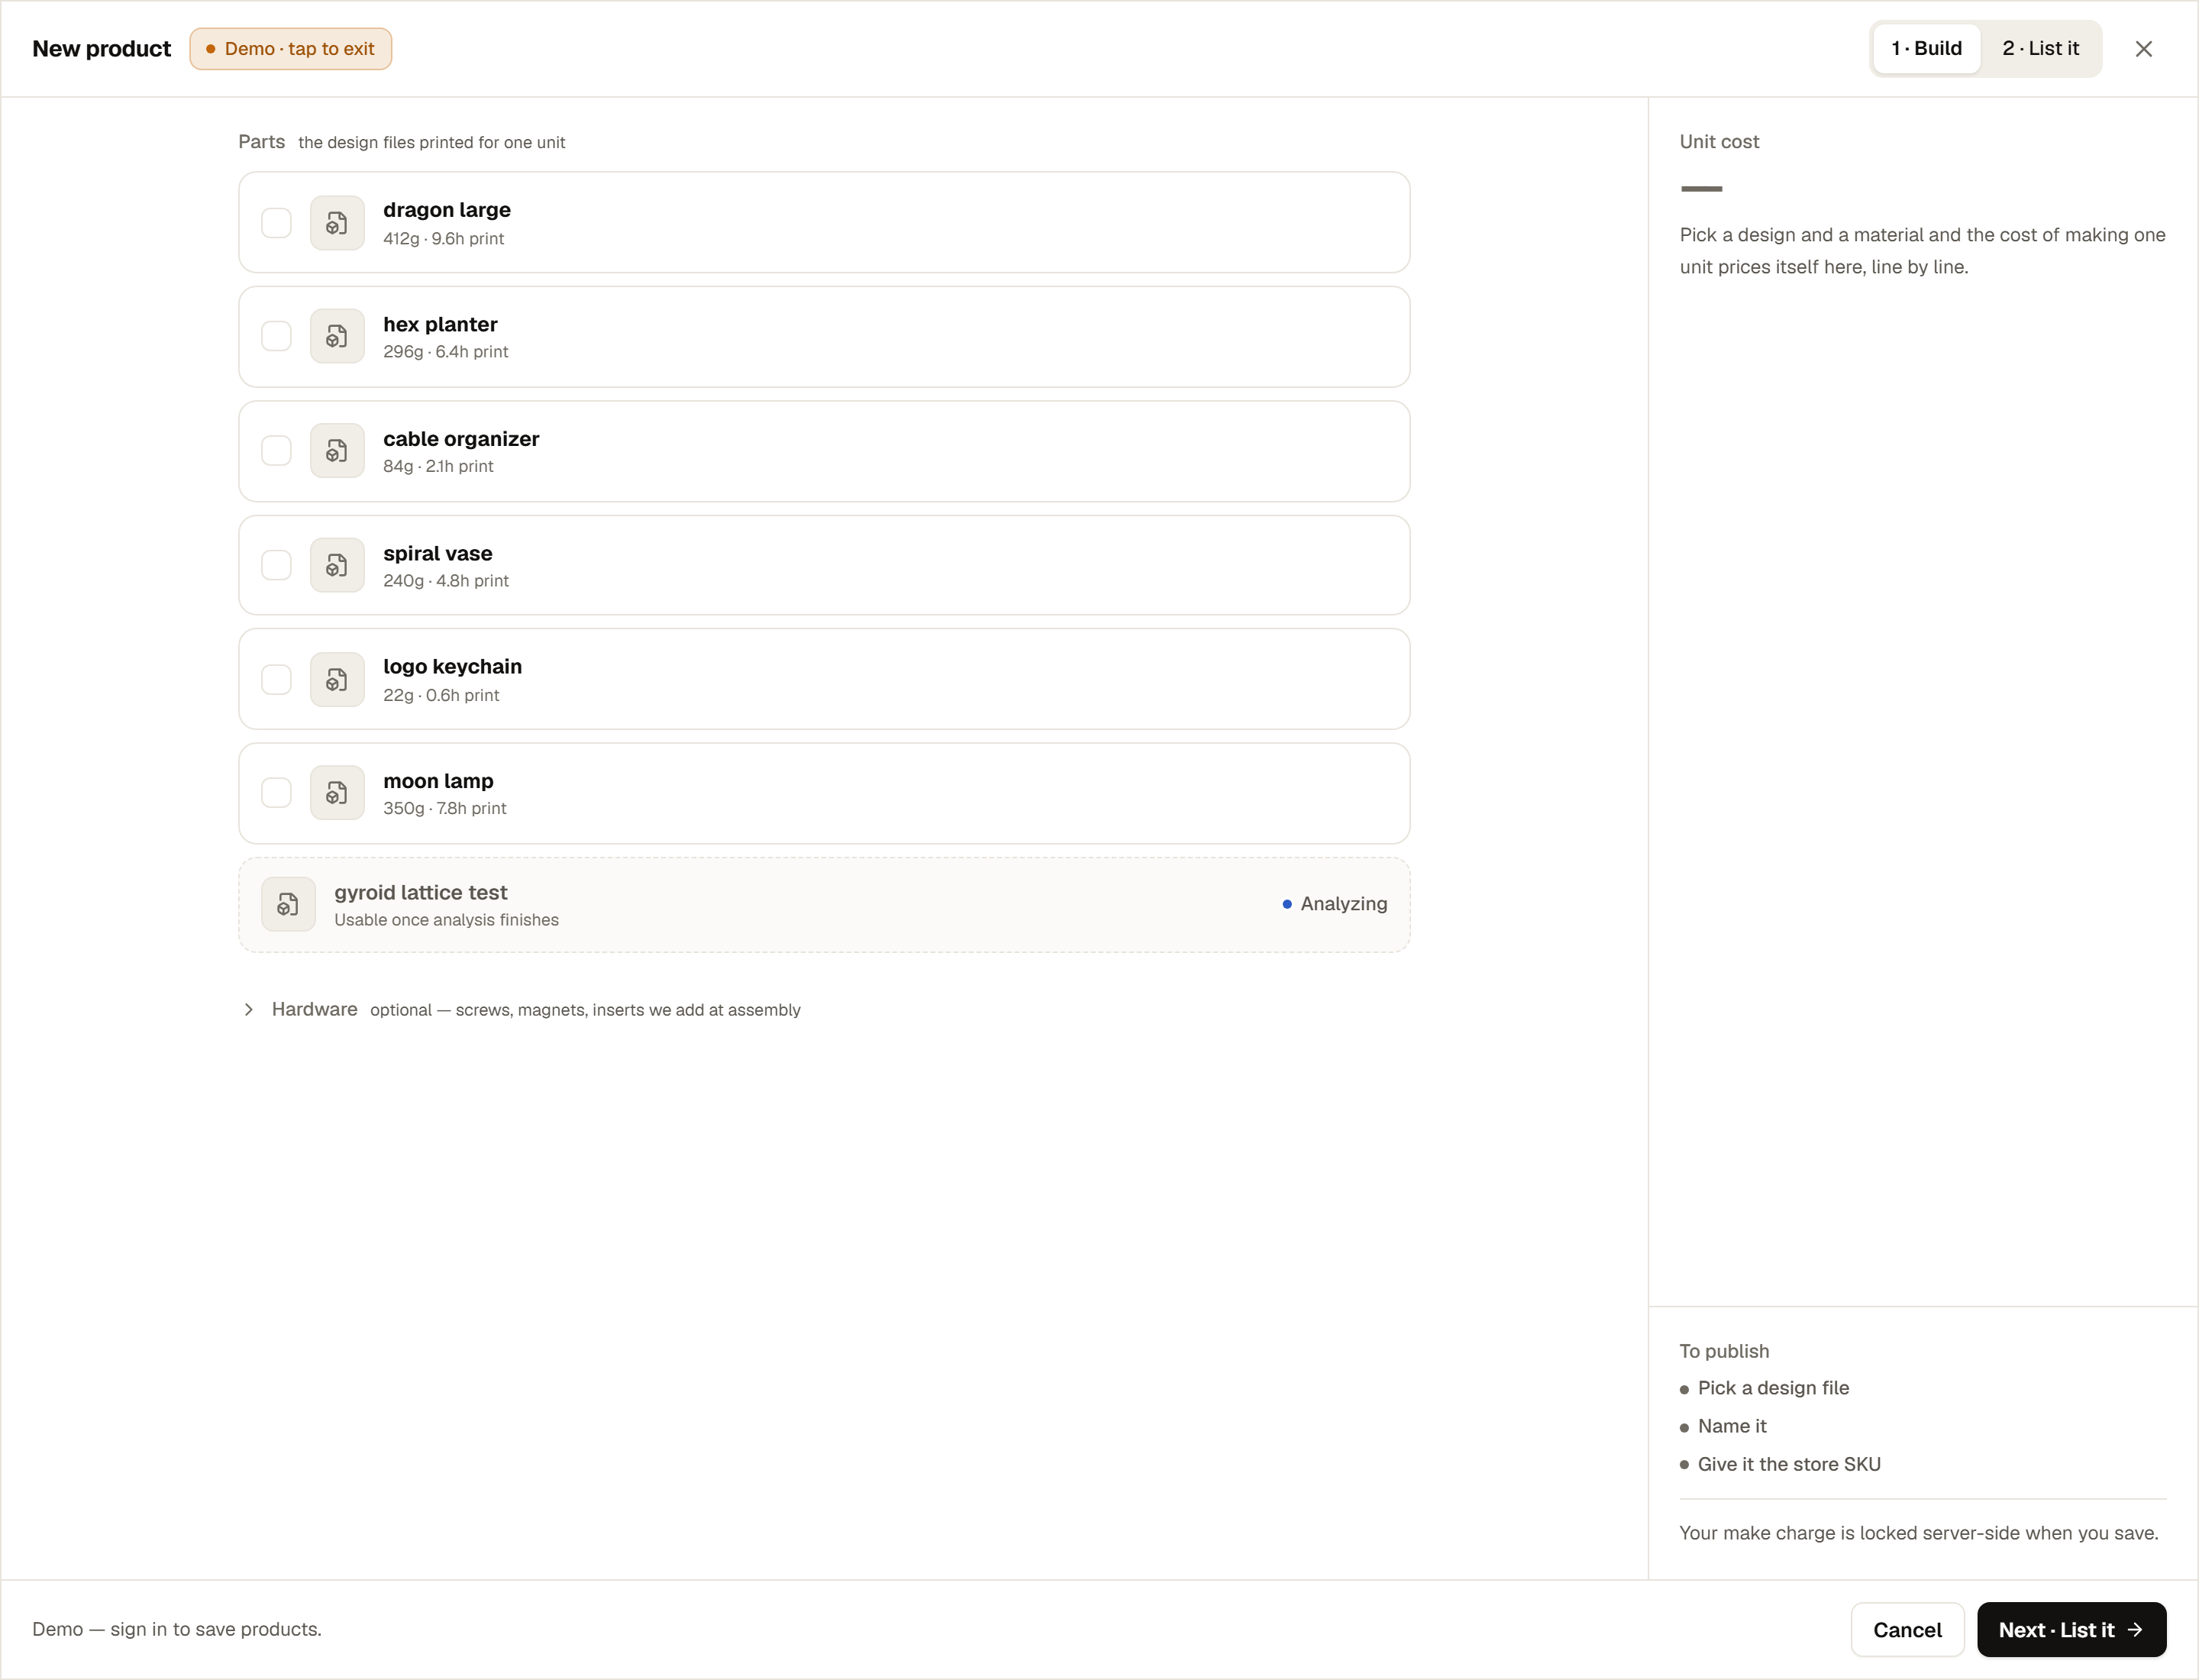
- 1
Select your design files
Every Ready design shows a checkbox. Select the designs that make up a unit. Most products use a single design, but a product can combine several. A design that is still analyzing is not selectable until it is Ready. - 2
Set copies for each design
Each design has a + / − stepper that sets how many prints of that design go in one unit, from 1 to 50. For a pair of bookends, set that design to 2. - 3
Choose a material and color for every copy
Each copy gets its own material and color, chosen from live swatch chips. The list is drawn from real inventory, so it reflects what is in stock, such as PLA Basic, PLA Matte, PETG Translucent, and TPU 90A. A new copy inherits the previous copy’s choice, so you only change the ones that differ. - 4
Add hardware (optional)
Open the Hardware disclosure to add non-printed parts such as screws, magnets, or inserts, each with its own stepper. Their part price is added to your make cost, and hardware carries no labor charge. - 5
Answer the assembly question (on List it)
When a unit has more than one piece — several designs, several copies, or hardware — the List it step opens with Should we assemble it before it ships? Choose Assemble it and we put it together and check it before packing, for $1.00 per part in one unit (every printed copy and every hardware piece counts), and you can add written steps and attach photos, PDFs, or a short video. Choose Ship it loose and the pieces go in the box as printed. You cannot save until you have answered.
A material is required for every copy
Materials other than PLA Basic show an estimate
Print time, and therefore labor cost, depends on the material. PLA Basic is the upload baseline and prices instantly. Any other material — PLA Matte, PLA Silk, PLA Glow, PETG, ABS, TPU, and the rest — triggers a background re-slice to compute a material-accurate time. Until that completes, the rail shows a PLA-baseline number flagged estimate. The value updates automatically; you do not need to wait or refresh.
The receipt rail
As you build, the rail prices your unit in real time. It shows your make cost, the amount PrintPort charges your card to produce one unit, and a break-even. The Composer has no retail-price field. You never set a sale price here; that lives on your own store.
- Make costper unit
- Material plus labor plus hardware plus assembly (if you chose it) for one unit. Material is the sliced weight multiplied by your real inventory price per gram. Labor is $3 per print-hour, pro-rated when a print is under an hour. Hardware adds its part price only. Assembly adds $1.00 per part. Orders are billed at least $2.00 to make; the floor is per order, not per unit.
- Break-evenper unit
- The make cost, or the $2.00 order minimum when the make cost is lower. Shipping is not in it: your customer pays shipping at checkout. Below it, the rail shows a real Shippo rate to a typical US address as a guide to the shipping you charge. Your buyer’s actual address may differ.
The break-even is $4.78, the make cost. Below it the rail shows the shipping to charge, roughly $5.20 to a typical US address, which your customer pays at checkout. These figures are illustrative; your real numbers come from the design’s geometry and live material prices.
These numbers are a preview
For the full breakdown, including the “Below cost” alert once you have sales, see Price your products.
Step 2 · List it
Switch to 2 · List it (or click Next · List it in the footer) to name the product. These fields are for your own use and for order matching; none of them are pushed to your store.
- Product namerequired
- Your internal name for the product in your dashboard. Not sent to your store. Up to 160 characters.
- SKUrequired · unique
- The code that ties a store order back to this product. It is automatically uppercased as you type, so
stand-01becomesSTAND-01. Up to 80 characters, and it must be unique within your catalog; a duplicate is rejected. This is the code you put on your store listing. The characters must match, though case and any leading or trailing spaces do not. - Descriptionoptional
- Free text on the product, up to 1000 characters. Optional; leave it blank if you prefer.
The SKU is the only link to your store
stand-01, STAND-01, and Stand-01 all match. The characters themselves do matter. An underscore where you used a hyphen, a space in the middle, or any typo is a different SKU and will not match. See The SKU link.Save and publish, or save as draft
The footer holds two save buttons. Both write the same product and differ only in whether it is live. They stay disabled until the rail’s To publish checklist is complete:
- At least one design file selected
- A material chosen for every copy
- A product name entered
- A SKU entered
| Button | The product becomes | What that means |
|---|---|---|
| Save & publish | Live | Eligible for automatic order matching — a store order with this SKU fulfills on its own. |
| Save as draft | Draft | Saved but not live — orders for this SKU land unmatched and wait for you to map them by hand. |
- Save & publishThe product becomesLiveWhat that meansEligible for automatic order matching — a store order with this SKU fulfills on its own.
- Save as draftThe product becomesDraftWhat that meansSaved but not live — orders for this SKU land unmatched and wait for you to map them by hand.
You can switch between Live and Draft at any time using the Publish / Move-to-draft toggle in the product’s drawer. See Manage your catalog.
Save & publish needs Shippo and a linked store
Publishing does not touch your store
What the server does when you save
Saving does not simply trust the rail. The server re-checks your identity, then recomputes every cost from the design’s real geometry and current inventory prices, forces the SKU to uppercase, confirms it is unique, and snapshots the labor markup so your price and your charge always agree. The make cost is locked server-side and cannot be edited by hand, which is what keeps it accurate.