Manage payment cards
Add a card, set your main card, and remove a card, all from Settings → Billing.
4 min read
PrintPort keeps one or more cards on file and charges the make cost when an order is produced. This page covers how to maintain that list: adding a card, choosing which card is your main, and removing a card without leaving orders stranded.
Where your cards live
Every saved card appears in one place: Settings → Billing. Open it from the Settings item in your workspace sidebar. You can also reach it from your Finance page. Its Update card link scrolls to Billing and highlights the panel.
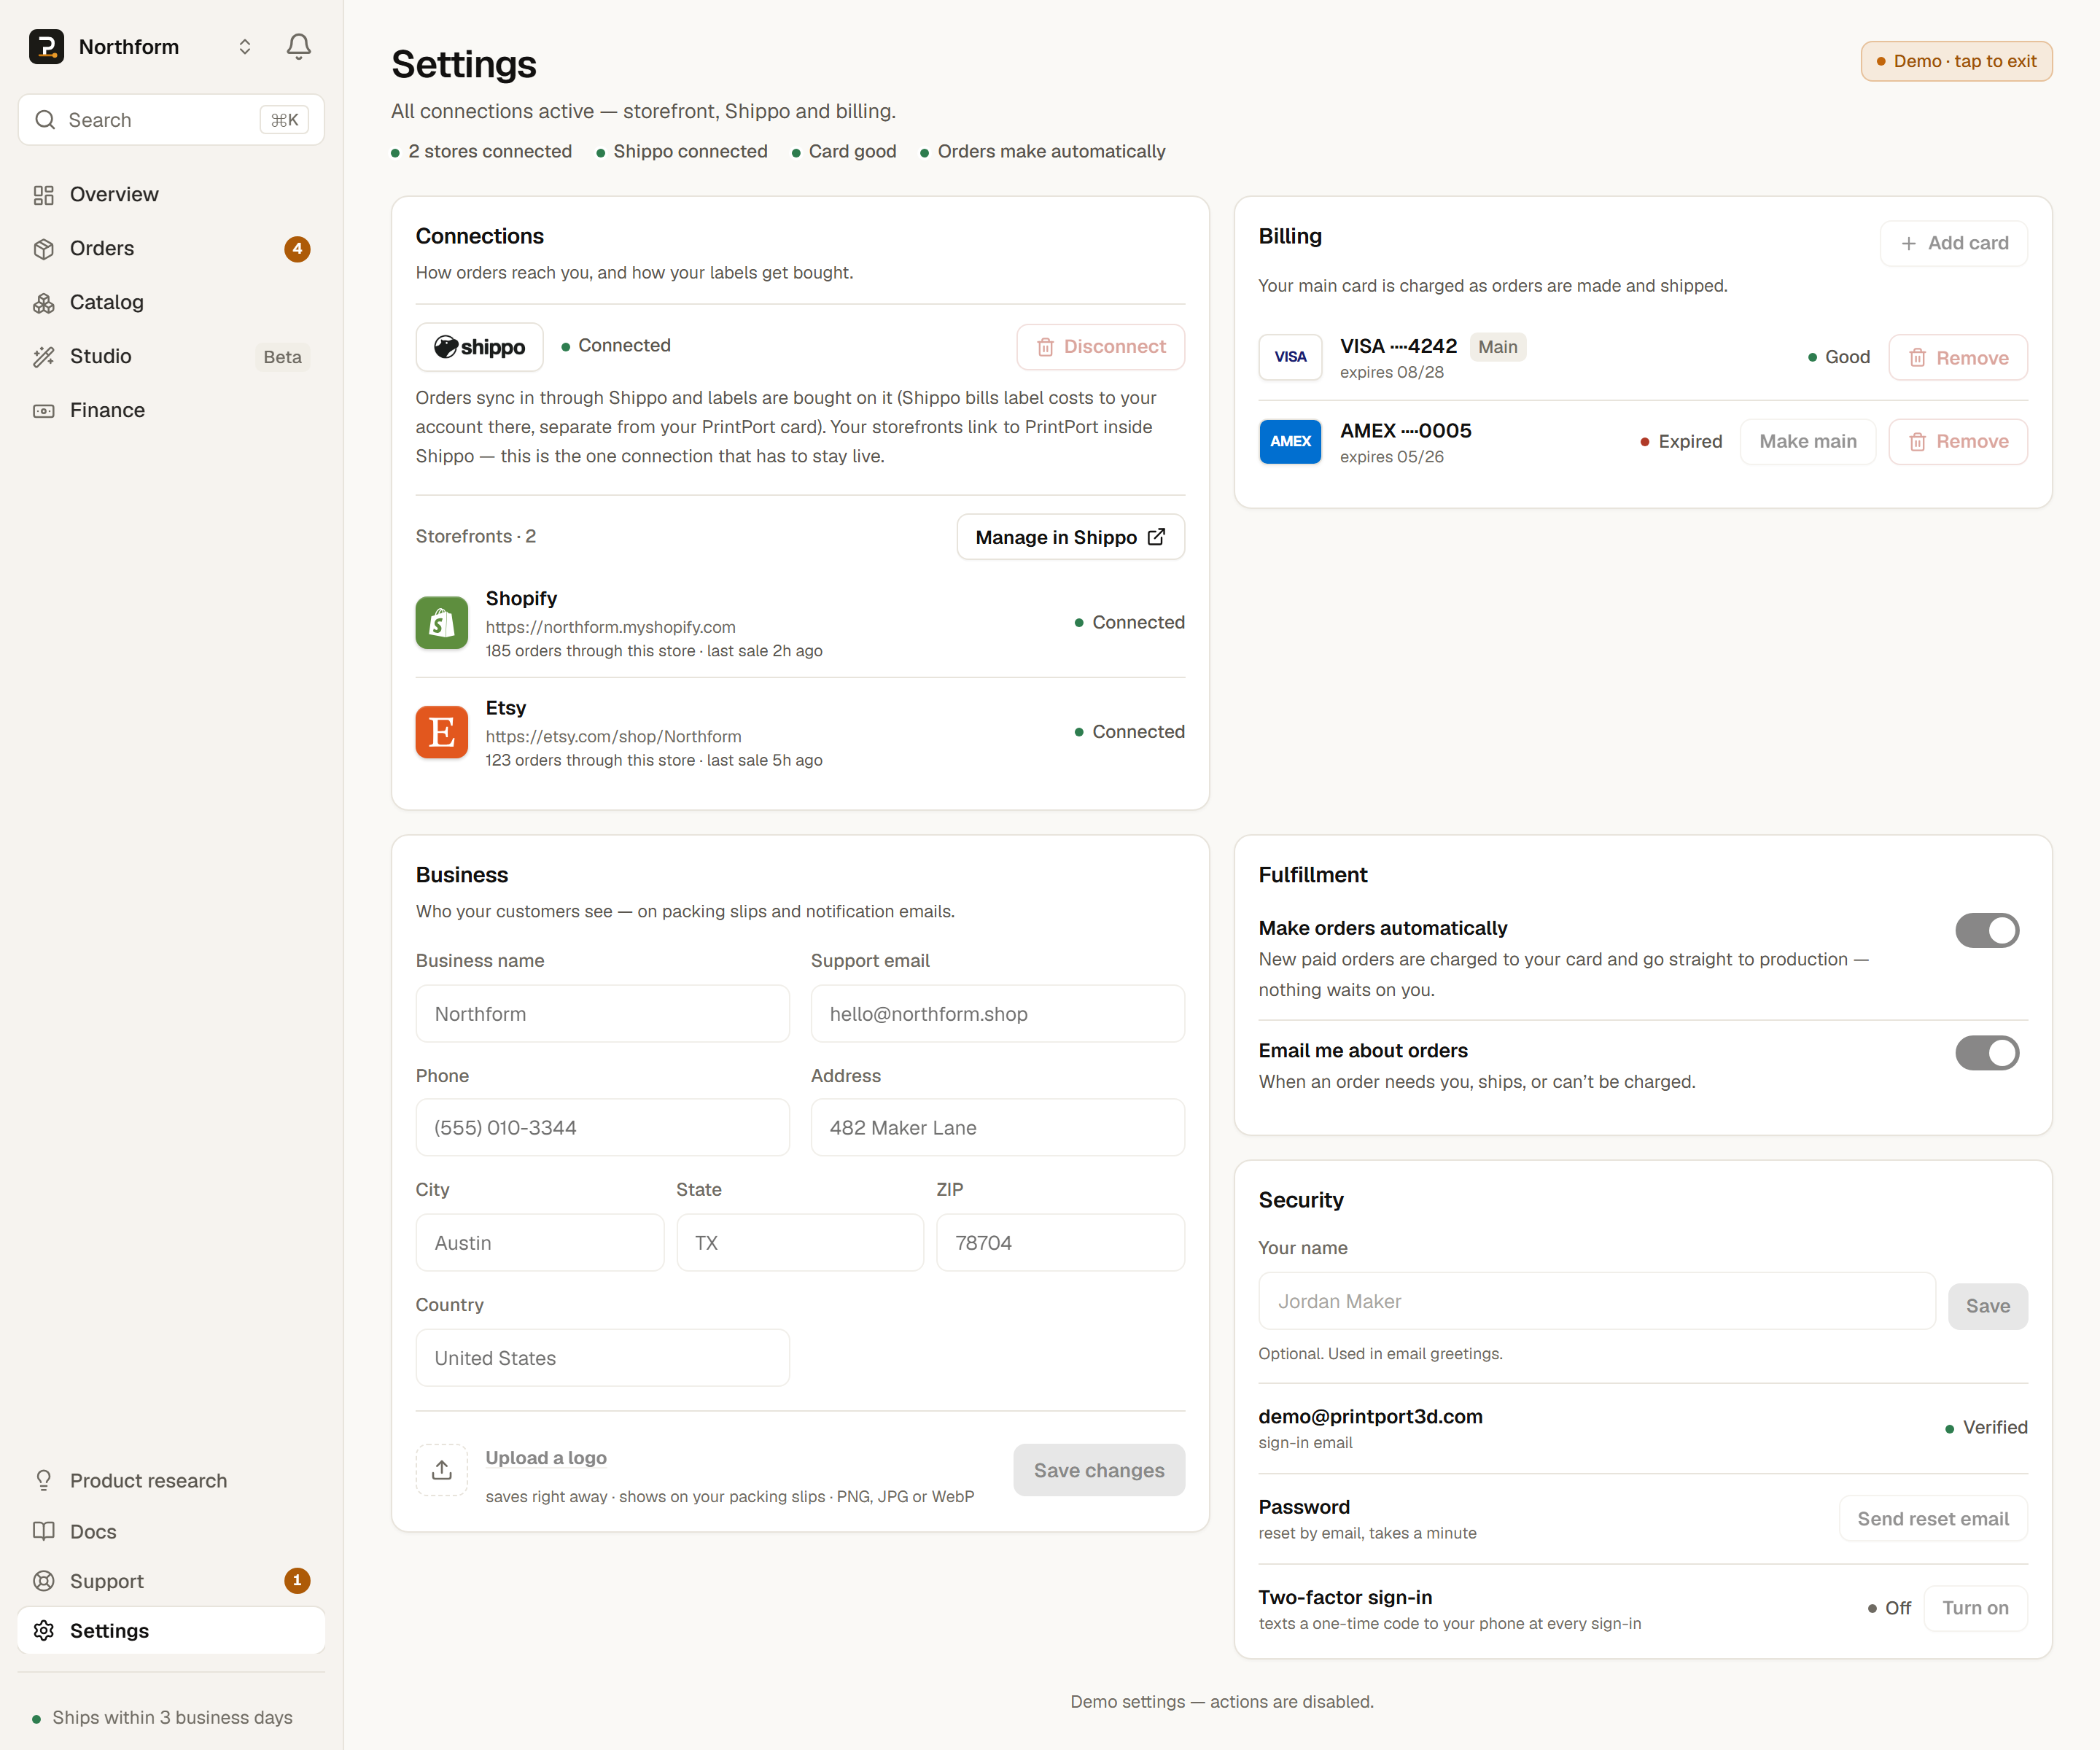
Each card appears as a single row. The row shows four pieces of information:
- BRAND ····last4
- The card network and its last four digits. This is enough to recognize the card and never includes the full number.
- Mainbadge
- A Main pill marks the card charged first for every order.
- expires MM/YY
- The card's expiry month and year.
- Status dot
- A Good, Expiring soon, or Expired indicator. See the last section for details.
A card has no nickname, no billing-address field, and no overflow menu. The only two actions available on a card are Make main and Remove.
Add a card
Adding a card opens a short, secure form. Your card number never reaches PrintPort. The secure field sends it directly to Stripe, our payment processor, which returns a token that stands in for the card. PrintPort stores only the brand, the last four digits, and the expiry.
- 1
Click Add card
InSettings → Billing, click Add card. A secure form opens. - 2
Enter the name on the card
Type the cardholder's full name. - 3
Select the card's country
Choose the country where the card was issued. The default is the United States. - 4
Enter your card details
Enter the card number, expiry, and CVC. The form does not ask for a ZIP or postal code, so there is no ZIP/AVS check when you save the card. - 5
Save the card
Click Save card. The row appears as soon as the card saves.
Verify your email first
Saving a card never charges you
Set your main card
Your main card is charged first for every order. The first card you add becomes your main card automatically. Adding more cards later does not change which card is main; you set that yourself.
To change it, click Make main on another card. The Main pill moves to that card immediately.
Additional cards act as backups
Removing a card
Removing a card takes two clicks. The confirmation step prevents deleting a card by accident.
- 1
Click Remove
The button changes to Really remove? - 2
Click again to confirm
The card is deleted from Stripe and from your list.
If you remove the card that was your main, PrintPort automatically promotes another saved card to main so an order is never left without one. If you remove your last card, no card is set as main.
Do not leave yourself with no card on file
Expiring and expired cards
Every card row carries a status indicator so you can address a problem before an order does. PrintPort derives the status from the card's expiry date:
A card keeps working through the last day of its expiry month.
| Status | What it means | What to do |
|---|---|---|
| Good | The card is more than 60 days from its expiry month. | Nothing. |
| Expiring soon | The expiry month is within the next 60 days. | Add a replacement card soon. |
| Expired | The card is past its expiry month. | Add a new card and make it main. |
- GoodWhat it meansThe card is more than 60 days from its expiry month.What to doNothing.
- Expiring soonWhat it meansThe expiry month is within the next 60 days.What to doAdd a replacement card soon.
- ExpiredWhat it meansThe card is past its expiry month.What to doAdd a new card and make it main.
When your main card is expiring or has already expired, PrintPort surfaces a warning. The health band at the top of Settings and your Finance page both show it, reading “expires soon” or “has expired — orders will stall,” with an Update card button. Add a new card and make it main to clear the warning.
An expired main card stalls orders