Link your store in Shippo
Attach each storefront inside Shippo so its orders flow into PrintPort3D.
4 min read
After you connect Shippo to PrintPort3D, you tell Shippo which stores to watch. This step happens inside Shippo, at apps.goshippo.com, and it is what starts your orders flowing into PrintPort3D.
How the connection works
Connecting a store takes two steps, and both must be in place before any order can move.
- Connect Shippo to PrintPort3D. On the previous page you linked your Shippo account to your PrintPort3D account. See Connect Shippo.
- Attach your storefront inside Shippo. In the Shippo dashboard, you connect your actual storefront (Shopify, Etsy, and so on) so Shippo can read its orders. This page covers that step.
No orders arrive until a store is attached inside Shippo. Stores are added and removed only in the Shippo dashboard, not in PrintPort3D.
Both steps are required
Connecting your store in Shippo
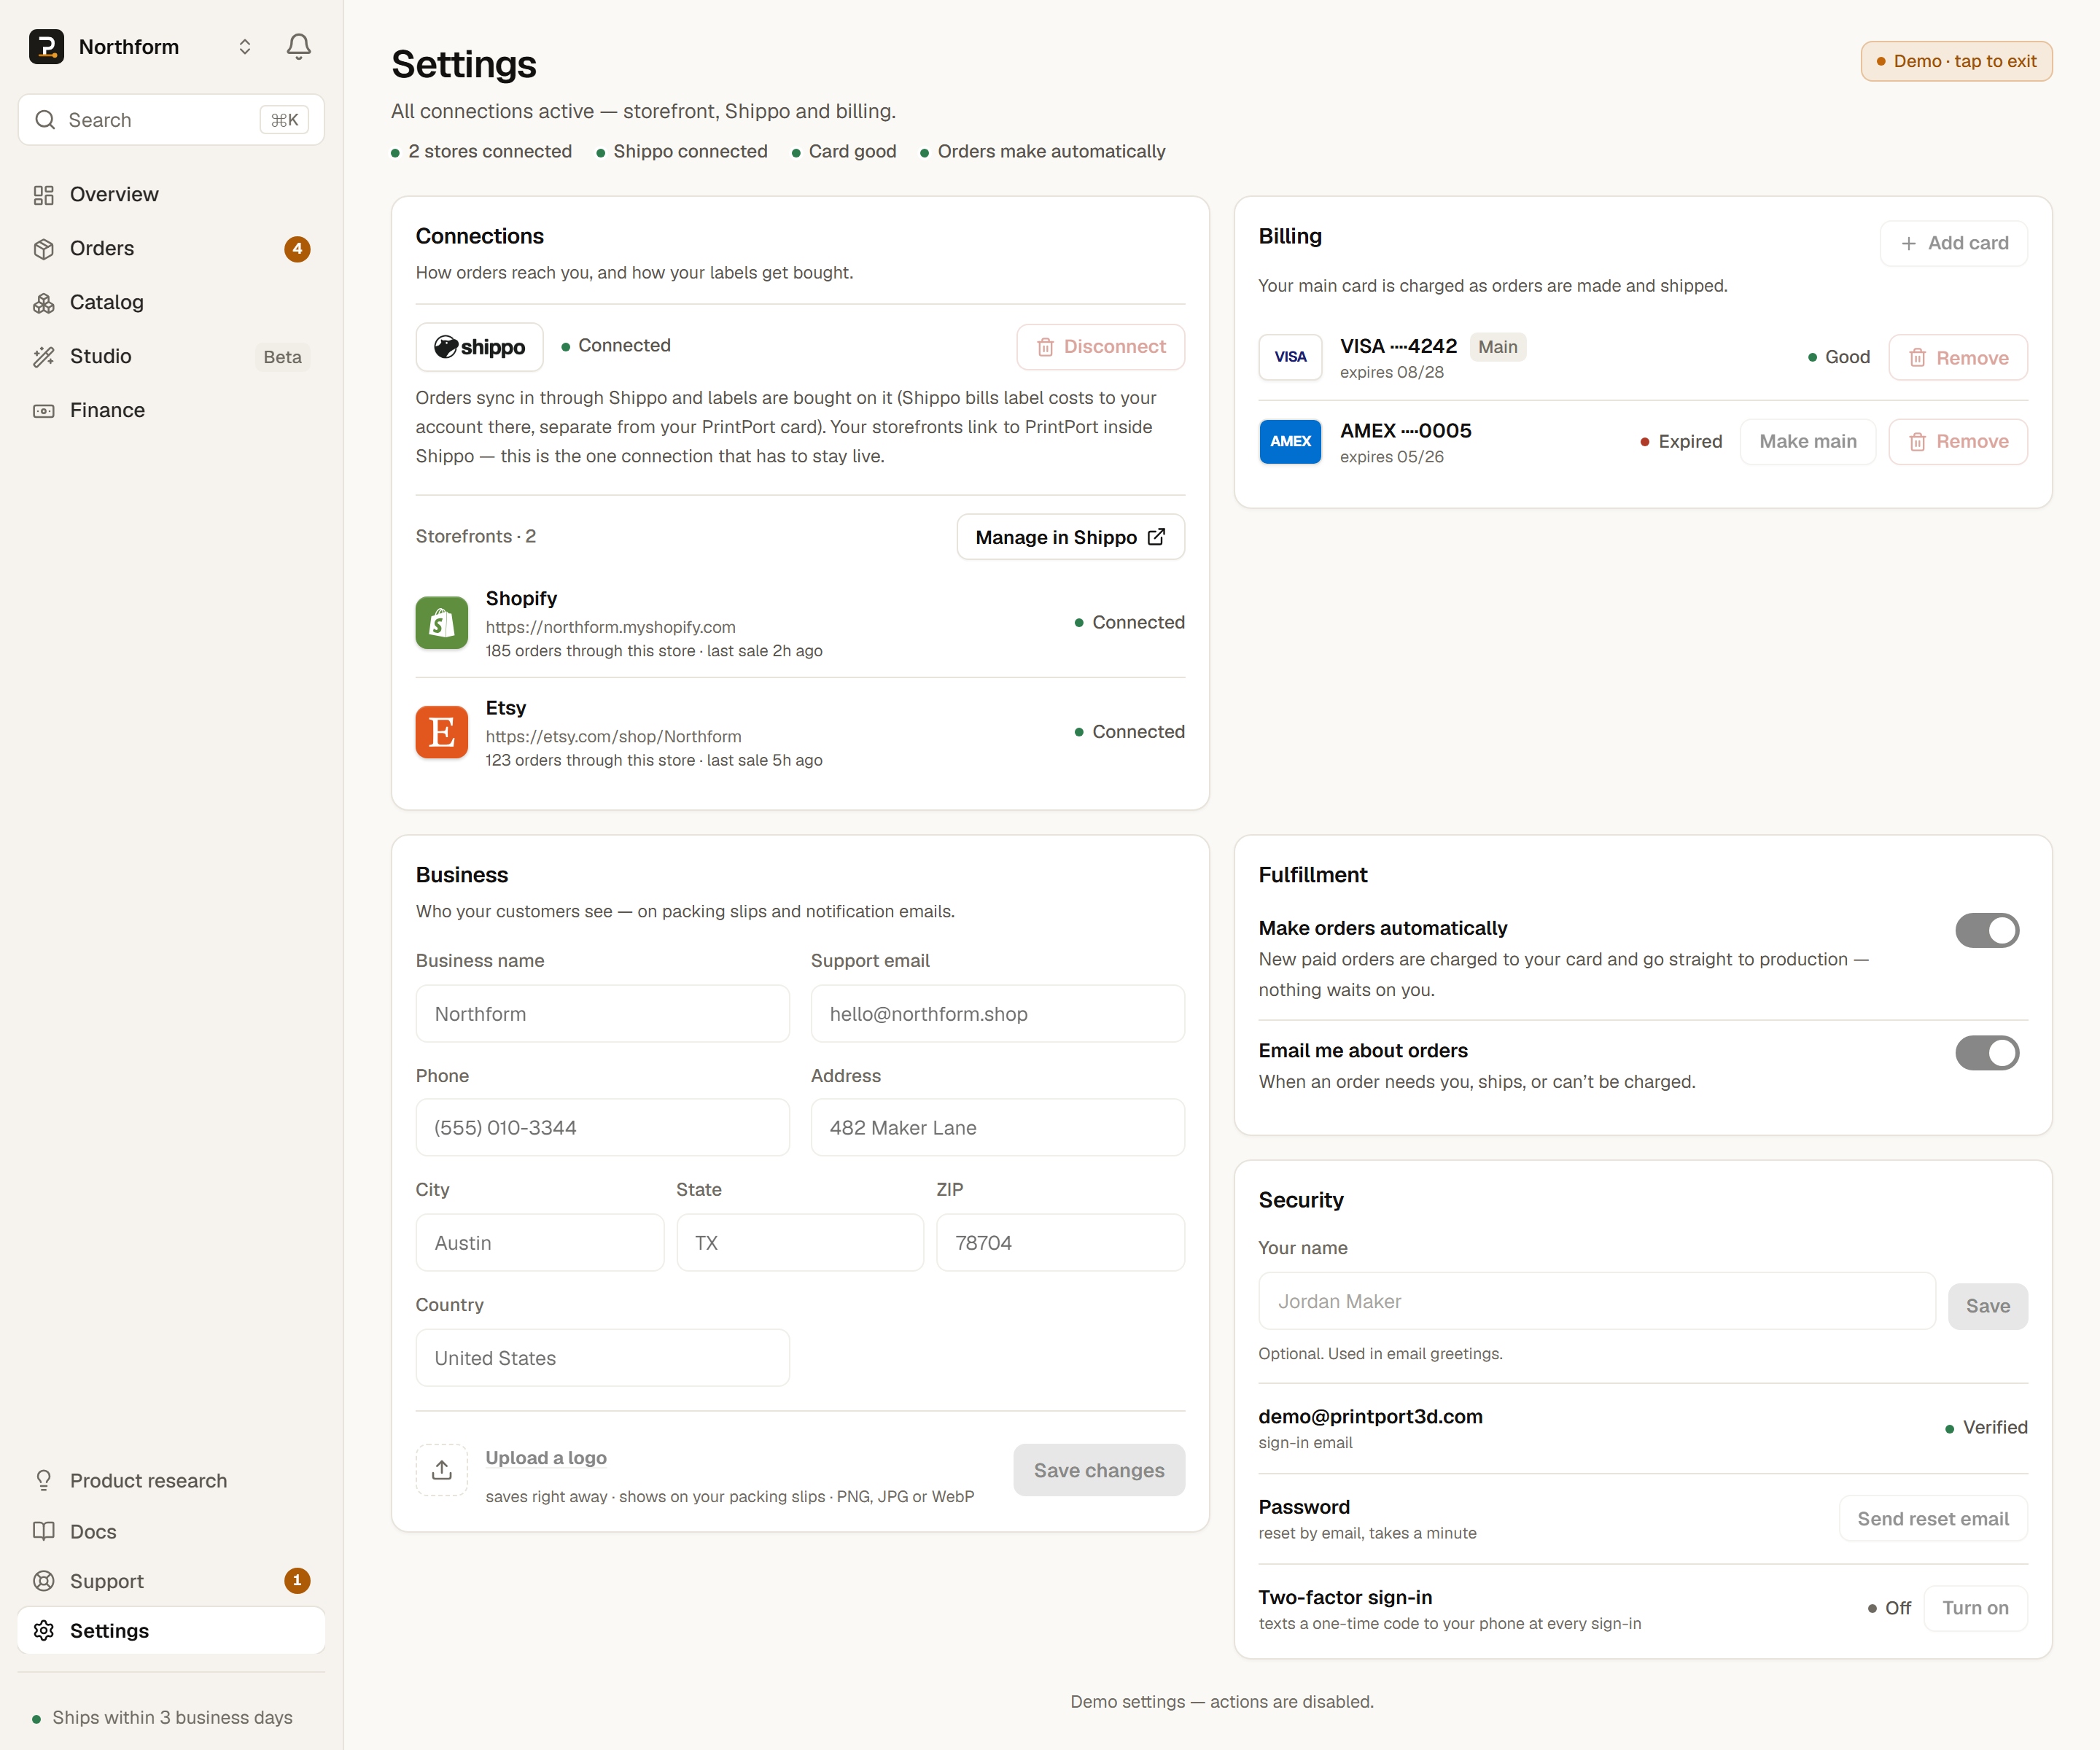
Open Shippo and attach each storefront you sell on. The button in Settings → Connections opens your Shippo dashboard in a new tab; the store connections live under Settings there. It reads Add in Shippo until your store is linked, and Manage in Shippo afterwards — same destination either way.
- 1
Open the Shippo dashboard
Go toapps.goshippo.com/settings/connectand sign in to the same Shippo account you just authorized. - 2
Select your platform in Shippo
Choose the store you want to attach. Shopify, Etsy, Amazon, and the rest appear in Shippo’s own list. - 3
Sign in and authorize
Log in to that storefront and allow Shippo to read its orders. Your store login happens on Shippo’s side and never touches PrintPort3D. - 4
Repeat for each storefront
If you sell on more than one channel, attach each one in Shippo. PrintPort3D reflects all of them.
Confirming the connection in PrintPort3D
Once a store is attached in Shippo, PrintPort3D reads it back. Open Settings → Connections to see a read-only Storefronts list. Each store Shippo reports appears as one row with a real order count, and the hero shows how many stores are connected.
There is no “add store” button here by design. Shippo provides no way for PrintPort3D to add, edit, or remove a store connection, so PrintPort3D only reflects what Shippo reports. To add or change a connection, use the link out to Shippo — labelled Add in Shippo before your first store is linked and Manage in Shippo after it — which opens the Shippo dashboard.
The four states of the read-only Storefronts list in Settings.
| The Storefronts panel says | What it means |
|---|---|
| Connect Shippo above, then connect your stores inside it | Shippo isn’t connected yet — finish the previous step first. |
| No storefronts connected in Shippo yet | Shippo is linked, but no store is attached inside Shippo. Complete the steps above. |
| N orders through this store · last sale … | That storefront is linked and its orders are matching your Catalog. |
| no orders seen from this store yet — check your listing SKUs match your Catalog | Linked, but nothing has matched — almost always a SKU mismatch. |
- Connect Shippo above, then connect your stores inside itWhat it meansShippo isn’t connected yet — finish the previous step first.
- No storefronts connected in Shippo yetWhat it meansShippo is linked, but no store is attached inside Shippo. Complete the steps above.
- N orders through this store · last sale …What it meansThat storefront is linked and its orders are matching your Catalog.
- no orders seen from this store yet — check your listing SKUs match your CatalogWhat it meansLinked, but nothing has matched — almost always a SKU mismatch.
If Shippo cannot return its store list, PrintPort3D falls back to showing the channels it has actually seen orders from. A storefront may therefore appear here because you have had a sale through it.
Supported platforms
PrintPort3D recognizes eleven platforms: Shopify, Etsy, Amazon, TikTok Shop, eBay, Walmart, WooCommerce, Wix, Squarespace, Magento 2, and BigCommerce. Attach any of them inside Shippo, and PrintPort3D reads back whatever Shippo reports.
Shippo’s own catalog is broader than this list, but these eleven are the platforms PrintPort3D presents and understands. For details, see Supported platforms.
Troubleshooting
If a freshly linked store does not appear, work through these in order.
- The panel still says “connect your stores inside it.” Shippo is not connected on PrintPort3D’s side yet. Return to Connect Shippo and complete it. That step requires a verified email.
- Shippo is connected but no storefronts show. The attachment inside Shippo did not finish. Reopen
apps.goshippo.com/settings/connectand finish authorizing your store there. - A store shows zero orders. The SKU is the only value that joins a sale to your product. It is matched ignoring case and any leading or trailing spaces, but the characters must match. Confirm that the SKU on your store listing matches a product in your Catalog. Case and surrounding spaces do not matter, but a different character (a typo, or an underscore where you used a hyphen) is a different SKU. See The SKU link.
Allow a moment for Settings to refresh
Next steps
Your stores are connected. Orders from them arrive on the Orders page, shipped from the PrintPort3D warehouse in Orange, CA. One step remains before you can make anything: a card on file.